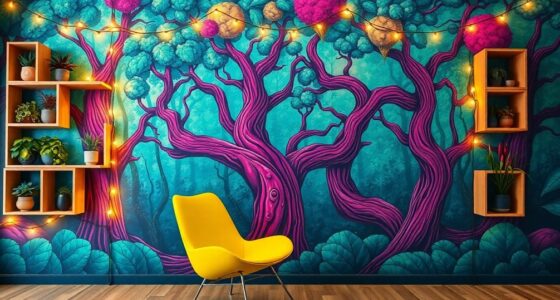
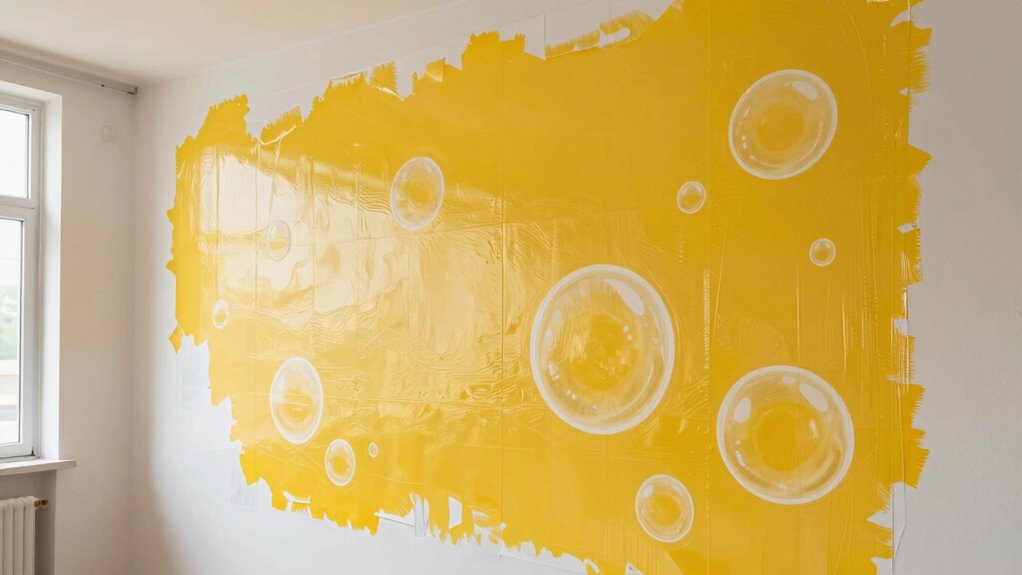
To apply a peel-and-stick wall mural without bubbles or seams, start with proper wall prep by cleaning, sanding, and priming for a smooth surface. Carefully align the mural before peeling the backing, smoothing air bubbles from the center outward with a squeegee or credit card. Make precise seam matching and avoid rushing steps. Following these tips guarantees a flawless finish; upcoming advice will help you master smoothing and troubleshoot any issues for a perfect look.
Key Takeaways
- Ensure the wall surface is smooth, clean, and primed to promote better adhesion and reduce bubbles.
- Use high-quality application tools like squeegees and leveling tools for precise placement and bubble removal.
- Carefully peel the backing layer slowly and evenly to prevent tears and misalignment during application.
- Align the mural meticulously before pressing, working from the center outward to eliminate air bubbles.
- Smooth out air pockets immediately with a squeegee or credit card, focusing on seams and edges for a seamless finish.
Assess and Prepare Your Wall for a Perfect Mural Application

Before you start painting your mural, it’s essential to thoroughly assess and prepare your wall. First, examine the wall’s texture; a smooth surface ensures better adhesion and reduces bubbles or seams. If your wall has uneven or rough areas, consider sanding or patching them to create a more uniform surface. Clean the wall thoroughly, removing dust, grease, and dirt that can weaken adhesive strength. Any debris can compromise the peel-and-stick application, leading to bubbles or peeling over time. It’s also wise to test a small section with adhesive to confirm it sticks well to your wall’s texture. When the surface is clean, smooth, and properly prepped, your mural will adhere better, stay flat, and look seamless for years. Additionally, understanding projector image quality factors can help you achieve optimal visual results if you plan to project images onto your mural. Knowing the support surfaces suitable for peel-and-stick murals can further ensure a successful application. Proper surface preparation techniques can also significantly improve the longevity and appearance of your mural. For best results, consider climate conditions, as humidity and temperature can affect adhesive performance and durability. Being aware of environmental considerations helps maintain your mural’s appearance over time.
Choose the Right Murals and Tools for Easy Installation
To make your mural installation smooth, you need to pick murals that suit your wall and style. Having the right tools, like squeegees and tape, makes application easier and cleaner. Also, guarantee your wall surface is properly prepared for a flawless, long-lasting finish. Mastering deep‑sky imaging techniques can help ensure your workspace is optimized for a perfect, bubble-free application. Paying attention to sound environment considerations during setup can further enhance your overall experience and results. Additionally, understanding Fin and Forage essentials can help you select the best materials and methods for a durable, professional-looking mural. Incorporating existential themes into your planning can also inspire more meaningful and authentic wall art. Proper surface preparation is crucial to avoiding bubbles and seams, ensuring a seamless appearance.
Selecting Compatible Murals
Choosing the right mural and tools is essential for a smooth installation process. Start by considering murals design to match your space’s style and color scheme. Opt for murals that suit your wall’s texture and material—smooth, flat surfaces work best for peel-and-stick applications. Check wall compatibility to ensure the mural adheres properly without bubbling or peeling over time. Some murals are designed specifically for easy application on certain wall types, so read product labels carefully. Avoid murals with intricate patterns or heavy textures that may complicate alignment and smoothness. Selecting a mural that’s compatible with your wall surface and design preferences simplifies the process and helps you achieve a seamless, professional look with minimal effort. Additionally, understanding your wall’s surface material can make a significant difference in the mural’s adhesion and longevity.
Essential Application Tools
Selecting the right application tools can make or break your mural installation. To guarantee a smooth process, invest in quality installation tools like a squeegee, leveling tool, and a clean cloth. These help you smooth out air bubbles and align the mural precisely. Application tape is essential for transferring the peel‑and‑stick mural without wrinkles or misplacement. It holds the design in place as you peel back the backing and position the mural on the wall. Using proper tools minimizes frustration and prevents damage, especially with large murals. Keep your tools clean and ready before starting. Familiarity with techniques and tips for perfect results can further enhance your installation process. Incorporating connected equipment and smart technology can also help monitor and ensure your mural remains in optimal condition over time. For example, smart maintenance tools can alert you to issues like air bubbles or damage early, allowing for prompt corrections. Proper application methods are crucial for achieving a professional, seamless appearance. Additionally, understanding wall surface compatibility can help prevent adhesion issues and ensure longevity. With the right application tape and installation tools, you’ll achieve a seamless, bubble-free finish that looks professional and polished.
Preparing Wall Surface
Before you start applying your mural, ensuring a smooth surface will save time and prevent headaches later. A well-prepared wall makes for easier installation and a flawless finish. To achieve this, consider these steps:
- Check your wall texture; smooth walls work best, so sand any rough spots or uneven areas.
- Clean the surface thoroughly to remove dust and grease, ensuring better primer adhesion.
- Apply a primer if needed—this helps seal the wall and creates a uniform surface, reducing the risk of bubbles and seams later.
- For optimal results, consider the surface material of your wall, as some surfaces may require additional preparation or special primers. Being aware of the wall’s texture type can also influence the choice of tools and techniques used during application.
- Additionally, understanding the nanotechnology advancements in surface coatings can provide insights into modern solutions for improving wall surfaces for murals. Proper surface prep is essential for peel-and-stick murals. Taking the time to smooth and prime your wall will make the process easier and a smooth surface can significantly enhance adhesion and reduce imperfections. Incorporating surface coatings that utilize nanotechnology can further enhance adhesion and durability.
How to Apply Peel-and-Stick Wall Murals Without Bubbles or Gaps

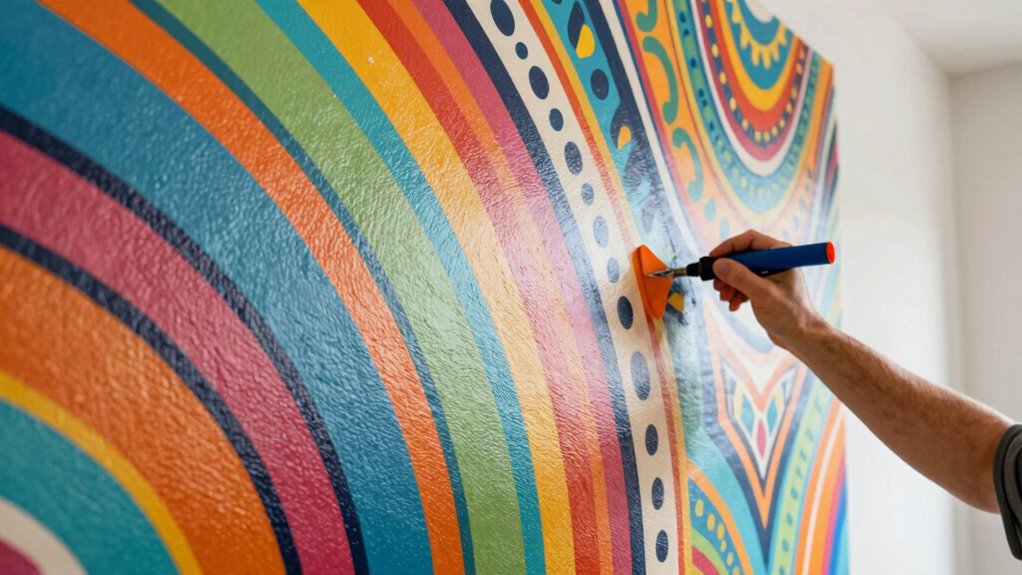
Applying peel-and-stick wall murals smoothly can be straightforward if you take your time and follow a few key steps. Start by carefully planning furniture placement so nothing obstructs the mural’s surface, ensuring you have enough room to work. Before applying, consider lighting; avoid harsh glare or shadows that can make bubbles or gaps more noticeable. Use even lighting to see the mural clearly during installation. When you begin, peel back a small section of the backing, align the top edge, and stick it down gently, smoothing as you go. Work from the center outward, pressing out air bubbles with a squeegee or a credit card. Taking your time and paying attention to these details helps guarantee a bubble-free, seamless finish. Proper application techniques can also enhance your space and make the mural look even more professional, especially when you understand the importance of cleaning surfaces to ensure better adhesion.
Common Mistakes to Avoid During Mural Installation
Make sure your wall surface is clean, dry, and smooth before starting, or you’ll risk bubbles and peeling. Pay close attention to applying the mural evenly and without gaps, following the correct techniques. Skipping these steps can cause issues that are hard to fix later, so don’t overlook them.
Proper Surface Preparation
Proper surface preparation is essential to guarantee your mural adheres smoothly and lasts over time. To achieve this, focus on creating a clean, smooth surface.
- Remove any wall texture inconsistencies by sanding or smoothing rough areas.
- Ensure the paint finish is matte or eggshell—glossy surfaces can cause bubbles or peels.
- Clean the wall thoroughly to eliminate dust, grease, or residue that could prevent proper adhesion.
Skipping these steps can lead to bubbles, seams, or premature peeling. Take your time to prepare the surface properly, and your mural will stick better and look flawless. Proper surface prep is the foundation for a seamless, professional-looking mural that stays beautiful over time.
Correct Application Techniques
Even with a well-prepared surface, mistakes during the application process can undermine your mural’s durability and appearance. Use proper scaling techniques to guarantee your mural fits perfectly without stretching or curling. Carefully align the mural before pressing it onto the wall, avoiding unnecessary repositioning that can cause bubbles or seams. When peeling the backing, do so slowly and evenly to prevent tearing or misalignment. Pay close attention to color matching, especially if you’re combining multiple panels or murals, to maintain a seamless look. Smooth out the mural gradually using a squeegee or a credit card, working from the center outward to eliminate air pockets. Avoid rushing, and double-check your placement before final adhesion for a flawless, bubble-free finish.
Tips for Smoothing and Finishing a Seamless Wall Mural

Achieving a seamless finish on your wall mural requires careful smoothing and precise finishing techniques. To guarantee your mural looks flawless, focus on three key steps:
- Use a squeegee or roller to smooth out bubbles, working from the center outward. This helps with pattern alignment and prevents wrinkles.
- Check color matching at seams, adjusting if needed with touch-up paint or additional peel-and-stick pieces to maintain a uniform appearance.
- Align patterns accurately before pressing down fully, ensuring seamless visual flow. Take your time to line up edges precisely for a professional look.
Troubleshooting Bubbles and Seams After Applying Your Wall Mural
After applying your wall mural, bubbles and seams can still appear if not addressed promptly. To fix air bubbles, gently lift the affected area and smooth out the bubble with a squeegee or credit card, working from the center outward. This helps with air bubble prevention and guarantees a flat surface. For seams that are visible or open, use seam concealment techniques such as pressing the edges firmly or applying a small amount of compatible adhesive behind the seam. If seams remain noticeable, consider gently trimming or overlapping slightly and smoothing again. Always work carefully to avoid creating new bubbles or wrinkles. Properly addressing bubbles and seams immediately helps maintain a seamless, professional look for your mural.
Frequently Asked Questions
Can Peel-And-Stick Murals Be Repositioned After Initial Application?
Yes, you can reposition peel-and-stick murals after the initial application. To do so, gently peel back the mural from the wall, avoiding damage. Use mural adjustment techniques like smoothing out air bubbles and aligning edges carefully. Repositioning allows you to perfect placement, ensuring seamless coverage. Just work slowly and carefully to prevent tearing or stretching, and you’ll achieve a flawless look with your repositioned mural.
What Is the Best Temperature for Applying Wall Murals?
You won’t believe how a perfect temperature can turn your wall mural application into a breeze—it’s like magic! For ideal temperature, aim for 65-75°F (18-24°C) to guarantee easy repositioning and smooth adhesion. Before applying, enhance temperature by checking your wall surface preparation; a clean, dry wall helps the mural stick flawlessly. Avoid extreme temperatures, which can cause bubbles or peeling, and make your mural look stunning for years!
How Long Do Peel-And-Stick Murals Typically Last?
Peel-and-stick murals usually last between 3 to 7 years, depending on durability factors like surface type and environmental conditions. To maximize their lifespan, follow maintenance tips such as cleaning gently with a damp cloth and avoiding harsh chemicals. Proper application and regular care guarantee your mural stays vibrant and intact longer, giving you a beautiful feature that withstands daily wear and tear.
Are There Specific Wall Types Unsuitable for Murals?
Think of your wall as a canvas—it’s not always suited for murals. You should avoid textured surfaces and moisture-prone walls, as they can cause bubbles, peeling, or poor adhesion. Peel-and-stick murals work best on smooth, dry, and clean surfaces. If your wall has bumps, rough patches, or high humidity, it’s better to prepare or choose a different spot to make certain your mural stays perfect and seamless.
How Can I Remove Murals Without Damaging the Wall?
To remove murals without damaging your wall, start with gentle removal techniques like peeling slowly from a corner. If adhesive persists, warm the mural with a hairdryer to loosen the glue. For wall preparation, clean the surface thoroughly and use a mild solvent if needed. Take your time and avoid using sharp tools that could scratch or gouge the wall, ensuring a smooth, damage-free removal process.
Conclusion
With patience and the right techniques, your wall mural transforms from a formidable project into a stunning focal point. Think of bubbles and seams as obstacles to avoid, not inevitable flaws. When you master the art of smooth application, you create a seamless masterpiece that elevates your space. Don’t rush—embrace the process—and soon, you’ll enjoy a wall so perfect, it’s hard to believe it’s peel-and-stick. Your mural’s flawless finish is just a few careful steps away.