
To get clean, sharp trim lines without tape, focus on surface prep and steady control. Clean the surface thoroughly and use high-quality tools like angled brushes for precision. Keep your paint slightly thickened and work slowly with deliberate, smooth strokes. Maintain a steady hand and avoid overloading your brush. With practice and proper technique, you’ll achieve professional results. Want to learn the step-by-step process to perfect those edges? Keep going to discover all the tips.
Key Takeaways
- Use a high-quality angled brush and maintain sharp brush edges for precise, clean lines.
- Keep paint slightly thickened and work slowly with steady, deliberate strokes for accuracy.
- Control paint flow by applying minimal pressure and avoiding overloading the brush to prevent drips.
- Incorporate surface preparation, ensuring surfaces are clean, dry, and free of contaminants before painting.
- Mask larger areas and use surface protection to prevent splatters and ensure tidy, professional results.
Benefits of No-Tape, No-Drip Painting for Perfect Trim Lines
Without the hassle of taping and the risk of drips, no-drip painting offers a cleaner, faster way to achieve sharp, professional-looking trim lines. One key benefit is improved edge smoothing, as you can carefully control the paint flow for crisp, precise edges without tape lines. This method also enhances paint adhesion, ensuring the paint bonds well to surfaces without lifting or peeling at the edges. You won’t have to worry about tape pulling off fresh paint or creating uneven lines. Plus, with no-drip techniques, you save time and reduce cleanup, making the entire process more efficient. Additionally, utilizing energy-efficient tools can further optimize your painting process and reduce environmental impact. Choosing the right type of projector technology can also be crucial for achieving the best visual results in your home cinema. Overall, this approach delivers a neat finish, minimizes mess, and gives you professional results with less effort, especially when you incorporate proper surface preparation to ensure optimal adhesion and longevity.
Tools You’ll Need for Flawless No-Tape Lines

Achieving flawless no-tape lines begins with selecting the right tools to give you precise control and a clean finish. You’ll need a high-quality angled brush for detailed work and sharp edges. Keep your brush techniques steady, using smooth, even strokes to avoid drips and uneven lines. Consistent paint is essential; aim for a smooth, slightly thickened consistency to prevent drips while maintaining flow. Using the proper tools can also help minimize mess and make the process more efficient. Additionally, understanding paint consistency and how it influences application can significantly improve your results. Mastering technique is key to achieving professional-looking results without tape. Proper preparation and choosing the right brushes can further enhance your control and accuracy during the project. Being familiar with the no-drip method can also help you avoid common pitfalls and achieve cleaner lines effortlessly.
Preparing Your Surface for Best Results

Start by thoroughly cleaning your surface to remove dust and grease, ensuring a smooth finish. Use masking or covering materials to protect areas you don’t want painted or trimmed. Allow the surface to dry completely before you begin to achieve the best, clean lines. Incorporating surface preparation techniques can further improve the final appearance. Paying attention to proper surface treatment can help prevent imperfections and ensure long-lasting results. Employing visual and auditory cues during preparation can enhance your attention to detail and consistency.
Surface Cleaning Techniques
Before you begin trimming, it’s essential to thoroughly clean the surface to guarantee smooth, clean lines. Dust, dirt, and grease can interfere with your no-drip method, causing uneven edges. For decorative patterns, use a soft brush or vacuum to remove loose debris without damaging intricate details. When working on textured surfaces, gently scrub with a damp cloth or sponge to lift stubborn grime, ensuring the paint adheres properly. Avoid harsh chemicals that might damage delicate finishes or cause paint to peel. Wipe the area with a damp cloth afterward to remove residue. A clean, dry surface is key to achieving crisp, professional-looking trim lines. Taking this extra step will help your no-tape technique work flawlessly, delivering clean results every time. Additionally, ensuring the surface is free of contaminants like oil or wax will help the paint or finish adhere better and prevent peeling. Incorporating proper surface preparation aligns with smart home principles, ensuring your project benefits from optimal conditions for a durable finish. Proper cleaning also reduces the risk of surface contamination affecting the final appearance and longevity of your work. Ensuring thorough cleaning can also prevent issues caused by residue buildup, which might compromise adhesion and finish quality over time. Paying attention to these details helps create a professional-looking result that lasts.
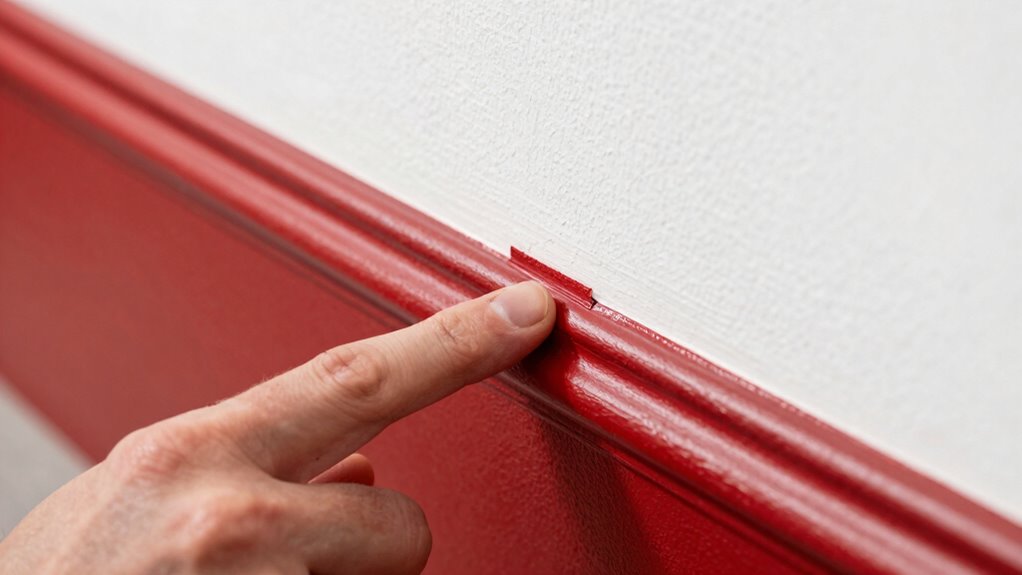
Masking and Covering
Once you’ve thoroughly cleaned the surface, the next step is to mask and cover areas you want to protect from paint or debris. Use painter’s tape or masking paper to create a clean boundary and prevent unwanted splatters. To achieve sharp, clean edges, gently smooth out the tape’s edges with your finger or a putty knife, ensuring good edge smoothing. This preparation enhances paint adhesion and reduces bleed-under. Cover larger areas with drop cloths or plastic sheets to shield furniture, floors, and fixtures. Proper masking minimizes touch-ups and ensures a professional finish. Taking your time at this stage ensures that when you start painting, your lines will be crisp, and your paint adhesion will be excellent, giving you a flawless, drip-free result. Additionally, for an even more precise edge, consider using edge painting tools designed to enhance boundary sharpness. Employing a clean workspace can also make the masking process more efficient and help achieve better results. Good preparation, including effective masking techniques, is essential for professional-looking results. Incorporating surface preparation techniques can further improve the overall finish and durability of your paint job.
Surface Drying Tips
Allow the surface to dry completely before applying paint or finishing touches, as wet or damp areas can cause uneven adhesion and drips. Proper surface drying ensures your brush techniques produce smooth, clean lines. Rushing drying times can lead to smudges or uneven coats, so be patient. To speed up the process, ensure good ventilation and use a fan if needed. Before painting, check for any remaining moisture by lightly touching the surface; it should feel dry and firm. Properly dried surfaces help prevent drips and improve the overall finish. Ensuring proper drying can make all the difference in achieving a professional look. Additionally, understanding dark psychology tactics can help you recognize and prevent manipulation attempts during stressful projects. When working on surfaces, consider environmental factors such as humidity and temperature, which can significantly impact drying times and finish quality.
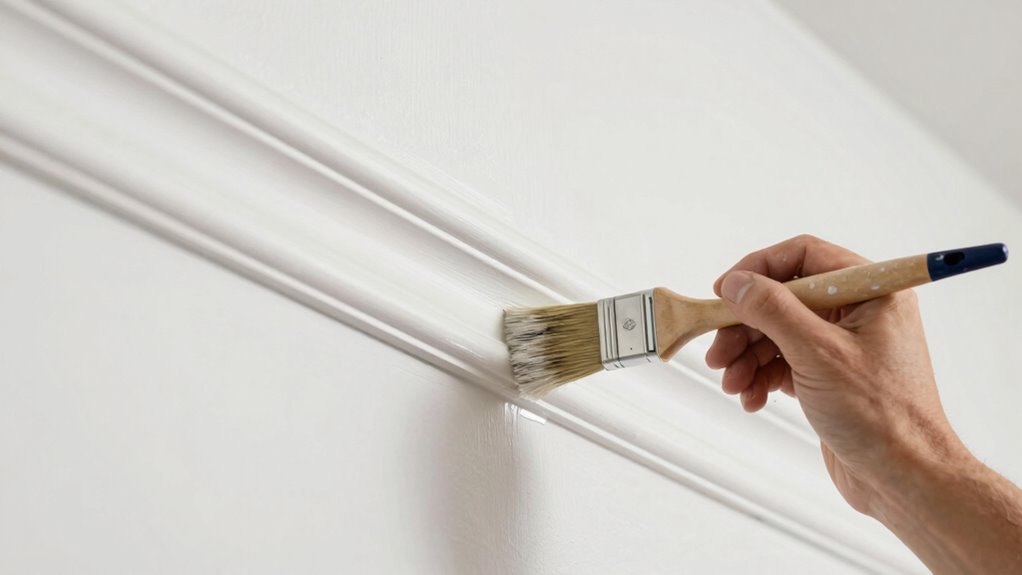
How to Paint Perfect Trim Lines Without Tape

Achieving clean, sharp trim lines without tape might seem challenging, but with the right technique, it’s entirely possible. Focus on maintaining excellent edge control by steadying your hand and using a small, angled brush. Keep the paint flow consistent—load your brush properly to avoid drips and uneven edges. Practice gentle, deliberate strokes along the trim line, applying minimal pressure for smooth results. To deepen your understanding, consider this table:
| Technique | Benefit |
|---|---|
| Steady hand | Precise edge control |
| Proper brush loading | Smooth, drip-free paint flow |
| Light pressure | Sharp, clean lines |
| Consistent motion | Avoids uneven paint application |
| Slow, deliberate strokes | Enhances accuracy and control |
Mastering these elements ensures professional-looking trim lines without tape.
Troubleshooting Common No-Tape Painting Problems
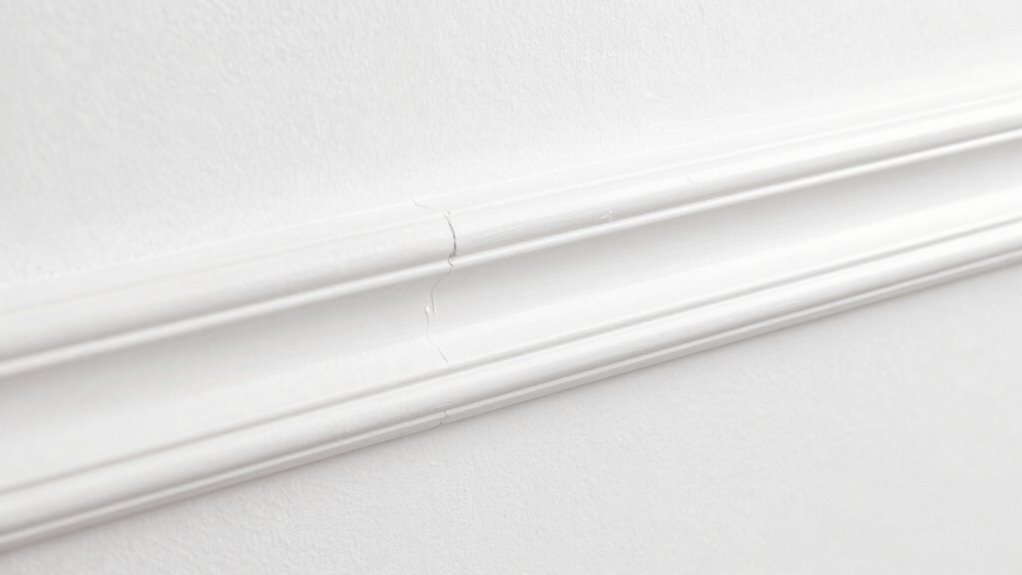
Sometimes, paint bleeds or feathers beyond your lines, making your work look messy. You might also notice uneven edge lines that ruin the crisp finish you want. Let’s explore how to fix these common no-tape painting problems and achieve clean, professional results.
Paint Bleeding and Feathering
When you paint without tape, you might notice paint bleeding or feathering beyond your intended lines. To prevent this, focus on proper brush techniques and maintaining the right paint consistency. Using a high-quality, slightly thinned paint helps control bleeding. Keep your brush’s edge sharp and work with smooth, controlled strokes to avoid excess paint spreading where it shouldn’t. Feathering involves blending edges seamlessly, so use light, gentle strokes to create a clean transition.
- Use a damp, high-quality brush for precise control
- Keep paint slightly thinned for smoother application
- Avoid overloading your brush with paint
- Work slowly and deliberately to prevent feathering
Uneven Edge Lines
Uneven edge lines often occur when you don’t maintain consistent pressure or angle while painting freehand. To improve edge precision, keep your brush or roller at a steady, consistent angle, and apply even pressure throughout each stroke. Sudden changes in pressure or direction cause line inconsistency, resulting in jagged or uneven edges. Practice controlling your hand movements and stay relaxed to maintain smooth, straight lines. Use a steady hand and focus on steady, deliberate strokes rather than rushing. If you notice unevenness, pause, and lightly correct the line with careful, controlled strokes. Developing a consistent technique helps you achieve clean, sharp edges without tape, ensuring your painted lines are smooth, uniform, and professional-looking.
Tips for Consistent, Professional-Looking Lines
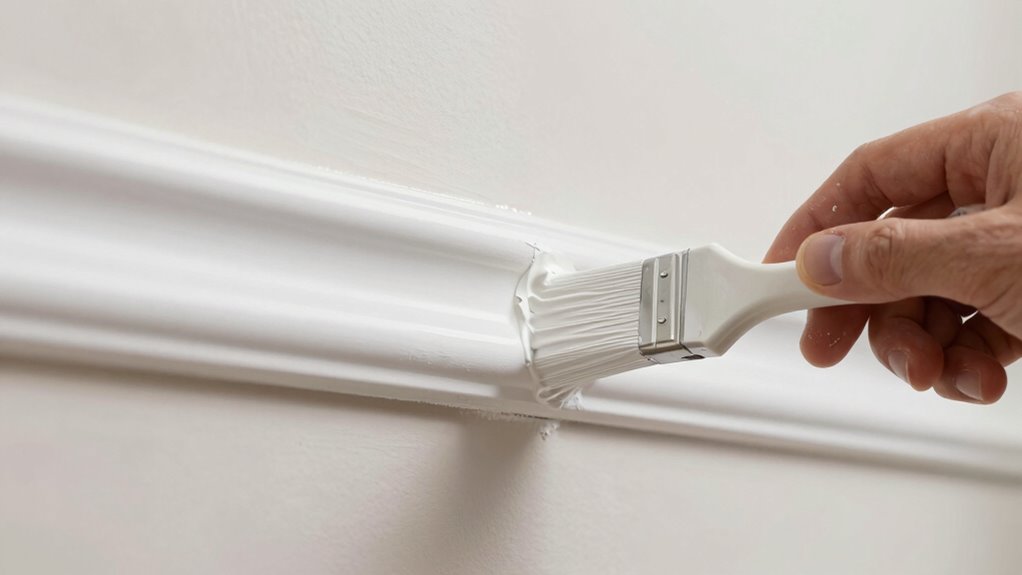
Ever wonder how to achieve crisp, professional-looking paint lines without tape? The key lies in mastering simple brush techniques and maintaining the right paint consistency. First, load your brush with just enough paint—avoid overloading to prevent drips. Use steady, controlled strokes, keeping a consistent angle and pressure. Keep your brush slightly angled for smooth, clean edges. Regularly check your paint, adding a small amount if it thickens. To improve precision, practice feathering the brush along the edge, minimizing jagged lines. Here are some tips to help you get professional results:
- Use a high-quality, angled brush for control
- Keep your paint at a smooth, even consistency
- Practice slow, deliberate strokes for accuracy
- Wipe excess paint off your brush frequently
Frequently Asked Questions
Can I Use This Method on Textured or Uneven Surfaces?
Yes, you can use this no-drip method on textured or uneven surfaces. To tackle texture challenges, guarantee proper surface preparation by cleaning and priming the area thoroughly. Use a steady hand and adjust your technique as needed to follow the surface contours closely. Applying thin, even coats helps prevent drips and ensures clean trim lines without tape, even on tricky, uneven surfaces.
How Long Should I Wait Before Painting Over the No-Drip Lines?
Did you know that waiting 1-2 hours for the no-drip paint lines to dry guarantees a smooth finish? You should wait until the paint is fully dry and feels tack-free before painting over it. This drying time prevents smudging or peeling. For best results, use touch-up tips like light sanding or applying a thin coat. Rushing can ruin your clean trim lines, so patience pays off.
Is This Technique Suitable for Different Types of Paint Finishes?
Yes, this technique works well for various paint sheens, from matte to semi-gloss, as long as you maintain surface smoothness. You should adjust your application based on the sheen you’re using, ensuring you don’t damage the finish. For glossy or slick surfaces, take extra care to keep lines sharp, and always allow proper drying time between coats to achieve a clean, professional look.
What Are the Best Conditions for Practicing This No-Tape Method?
When the stars align, you’ll get the best results practicing this no-tape method. Make certain the surface is well-prepared—clean, dry, and free of dust—to prevent mishaps. Keep your paint consistency just right—neither too thick nor too runny—so it flows smoothly. Ideal conditions include moderate temperature and low humidity, which help control drips and ensure crisp lines. Patience and attention to detail are your best friends here.
Can This Method Be Used for Outdoor Trim Painting?
Yes, you can use this method for outdoor trim painting, but keep environmental factors in mind. For better outdoor durability, choose weather-resistant paint and guarantee conditions are dry and mild. Avoid painting in extreme heat, cold, or high humidity, as these can affect the finish and adhesion. Proper preparation and patience will help your trim lines stay clean and sharp, even when exposed to outdoor elements.
Conclusion
Mastering the no-drip method is like steering a smooth river—once you find your flow, flawless trim lines come effortlessly. With the right tools, prep, and technique, you’ll transform your painting project into a masterpiece of precision. Remember, patience and practice are your oars; keep steady, and soon you’ll glide to perfect results. Embrace this method, and your walls will tell a story of craftsmanship without the need for tape.