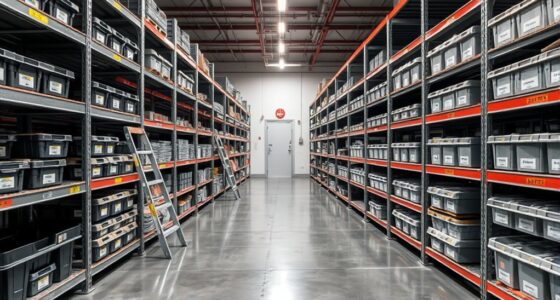
To set up a 72-inch rolling tool chest like a pro shop, start by evaluating your tools and workspace to plan an efficient layout. Categorize and organize tools by usage frequency, using dividers, foam inserts, and clear labels for quick access. Maximize storage by utilizing vertical space for long tools and power equipment. Regularly maintain and update your organization system to keep everything accessible and in top shape. Keep going to discover more expert tips!
Key Takeaways
- Assess your workspace, tools, and dimensions to create an ergonomic, accessible layout tailored for efficient workflow.
- Measure tools and spaces precisely, planning storage compartments and placement for easy access and organization.
- Categorize tools by usage frequency, using labels and custom compartments to maximize space and streamline retrieval.
- Utilize vertical storage solutions, wall racks, and adjustable shelves to optimize space and keep long or heavy tools accessible.
- Implement routine maintenance, labeling, and periodic updates to sustain organization, safety, and tool longevity over time.
Assess Your Tools and Workspace Needs First
Before organizing your tool chest, you need to understand what tools and workspace requirements you have. Start by taking a thorough tool inventory—gather all your tools, from screwdrivers to power drills. This helps you see what you truly need and identify duplicates or unused items. Consider your workspace ergonomics; think about how you move and work around your area. Do you need frequently used tools within easy reach? Are there tools that should be stored separately for safety? Knowing your workflow and storage needs ensures your setup is efficient and comfortable. Additionally, understanding the horsepower of electric dirt bikes can help you select the right tools for heavy-duty tasks, ensuring your setup is equipped for all your project needs. By evaluating these factors first, you’ll create a well-organized system that minimizes clutter, saves time, and makes your workspace more functional. Recognizing the importance of tool organization principles can further enhance your efficiency and safety. Incorporating storage solutions designed for specific tools can also optimize accessibility and protection for your equipment. Furthermore, considering energy-efficient technology can contribute to a more sustainable and cost-effective workspace.
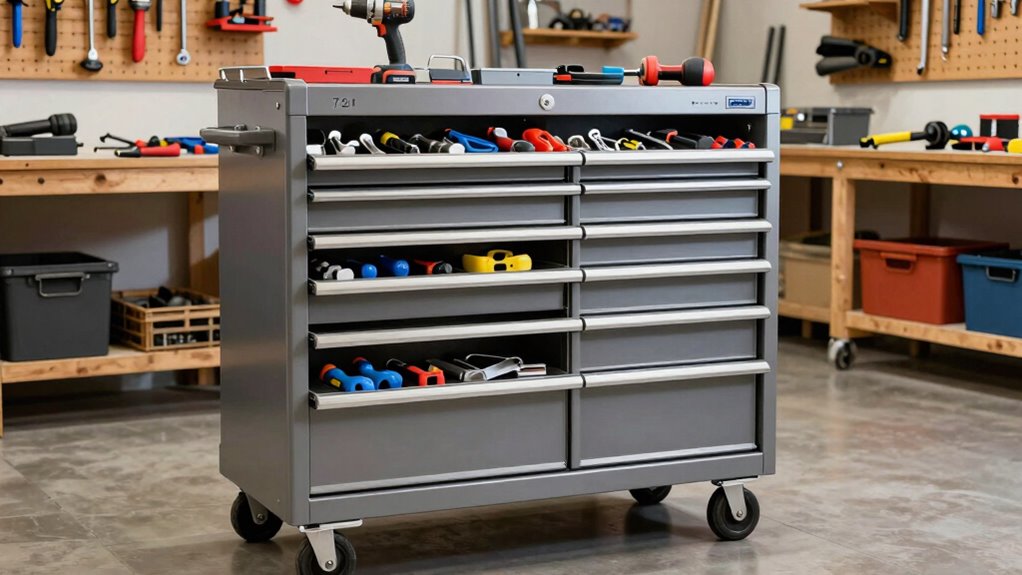
Measure and Plan Your 72-Inch Rolling Chest Layout
Start by measuring the space where your rolling chest will sit to guarantee it fits comfortably. Next, sketch out a layout that keeps your most-used tools within easy reach, considering their sizes. Planning ahead helps you organize efficiently and avoid surprises once you start arranging everything. Additionally, understanding tool storage best practices can further optimize your setup for quick access and safety. Incorporating outdoor workspace organization principles can also help maintain a clutter-free environment and streamline your workflow. Performing a seasonal maintenance check on your tools and storage areas ensures everything remains in top condition throughout the year. Familiarizing yourself with decoding slang can also enhance your communication with fellow DIYers and professionals, making collaboration smoother. Moreover, applying principles from Deaf Vibes can inspire innovative ways to improve your workspace acoustics, reducing noise distractions and creating a more focused environment.
Measure Available Space
Have you measured your available space to guarantee your 72-inch rolling chest fits comfortably? Using a measuring tape, accurately determine the length, width, and height of the area where you plan to place the chest. Don’t forget to account for clearance space around it for easy access and movement. Proper space planning ensures your workspace remains functional and organized. Measure doorways, pathways, and any obstacles that could interfere with rolling it in or out. Consider the height of nearby shelves or cabinets to ensure smooth operation. Taking these measurements now prevents surprises later, saving you time and effort. Clear, precise measurements are the foundation of an efficient setup, helping you decide the best placement for your tool chest and optimize your workspace. Additionally, understanding media literacy can help you evaluate online product information or reviews to make confident purchasing decisions. Being mindful of space constraints ensures your organization efforts are realistic and effective in your specific environment. To further enhance your setup, exploring ergonomic principles can improve comfort and productivity during tool access and organization.
Sketch Your Layout
Creating a detailed sketch of your workspace helps you visualize how your 72-inch rolling chest will fit and function. Plan your layout to prioritize tool safety by positioning frequently used tools within easy reach, reducing unnecessary movement. Incorporate ergonomic design principles to guarantee comfortable access and prevent strain during use. Consider the height and placement of drawers and shelves to promote efficient workflow and minimize clutter. Use your sketch to identify potential obstacles, ensuring smooth operation and accessibility. This plan helps you avoid future rearrangements and ensures your tools are organized logically. A well-thought-out layout keeps safety top of mind while maximizing efficiency, making your tool chest a reliable, user-friendly workspace. Additionally, understanding the organization of your tools can significantly improve your workflow and safety. Taking the time to plan your storage can make a substantial difference in how quickly and safely you complete tasks. Incorporating sound principles into your design can further enhance your workspace’s functionality. Being aware of space optimization strategies allows you to utilize every inch effectively and create a clutter-free environment.
Consider Tool Sizes
Before arranging your tools in the chest, it is essential to measure their sizes accurately. Knowing the dimensions helps you optimize space and enhance power tool ergonomics, making your workflow smoother. Consider both hand tool sizing and larger power tools to guarantee each fits comfortably. Use a simple chart to compare tool sizes:
| Tool Type | Typical Size |
|---|---|
| Hand tools | 6–18 inches |
| Power tools | 12–24 inches, bulky units |
| Small parts | 0.5–4 inches |
| Accessories | Varies, often compact |
This helps you allocate space efficiently, avoiding clutter and making tools easier to access. Proper planning based on size ensures your rolling chest stays organized and functional, streamlining your projects. Additionally, factoring in tool accessibility will further improve your storage efficiency and workflow.
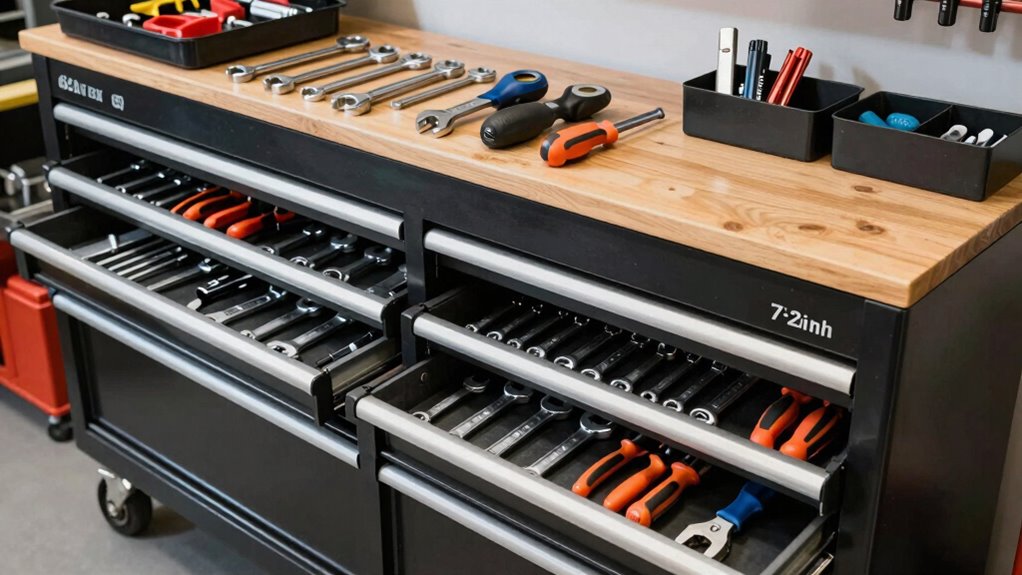
Categorize Tools by How Often You Use Them
Organizing your tools by how often you use them helps keep your workspace efficient and clutter-free. When you focus on tool categorization based on usage frequency, you ensure frequently needed tools are within easy reach, saving you time and effort. Start by identifying your most-used tools and placing them in accessible drawers or compartments. Medium-usage tools can go in slightly less accessible spots, while rarely used items can be stored further away. This method streamlines your workflow and prevents clutter. To optimize, consider these tips:
- Separate tools by daily, weekly, and occasional use.
- Use labels for quick identification.
- Store high-demand tools at eye level.
- Keep seldom-used tools in dedicated, less accessible sections.
This approach keeps your tool chest organized and enhances your productivity.
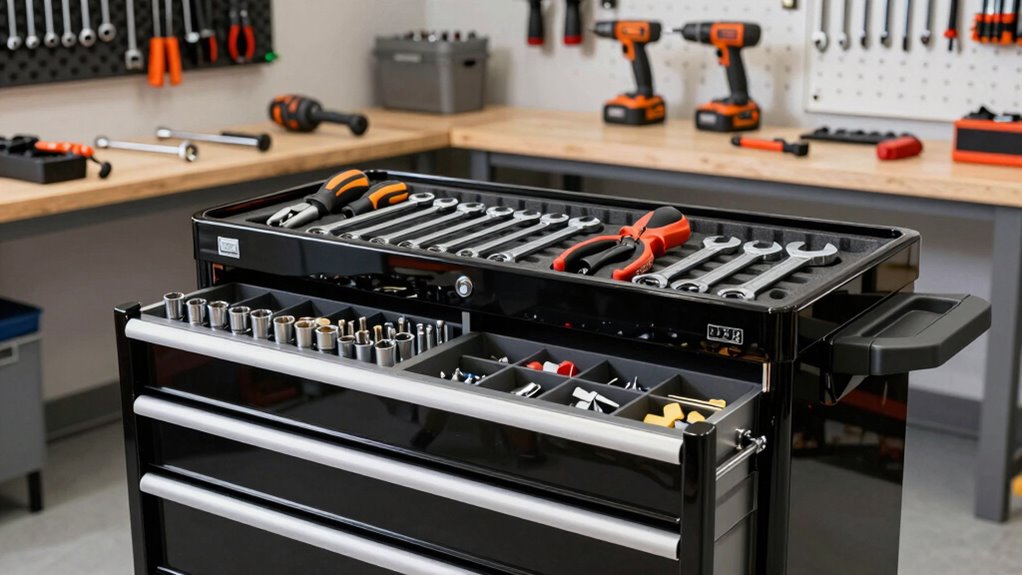
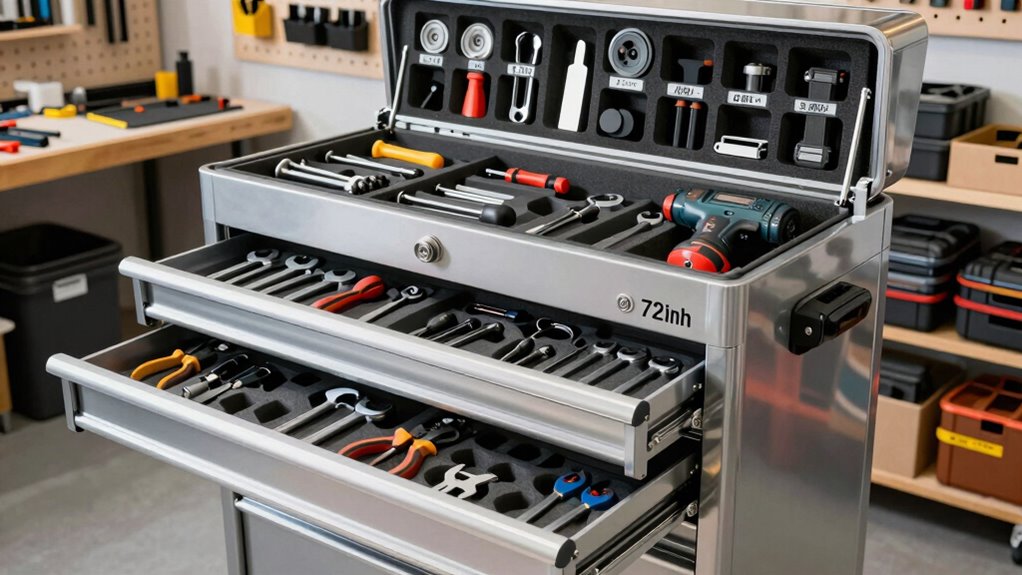
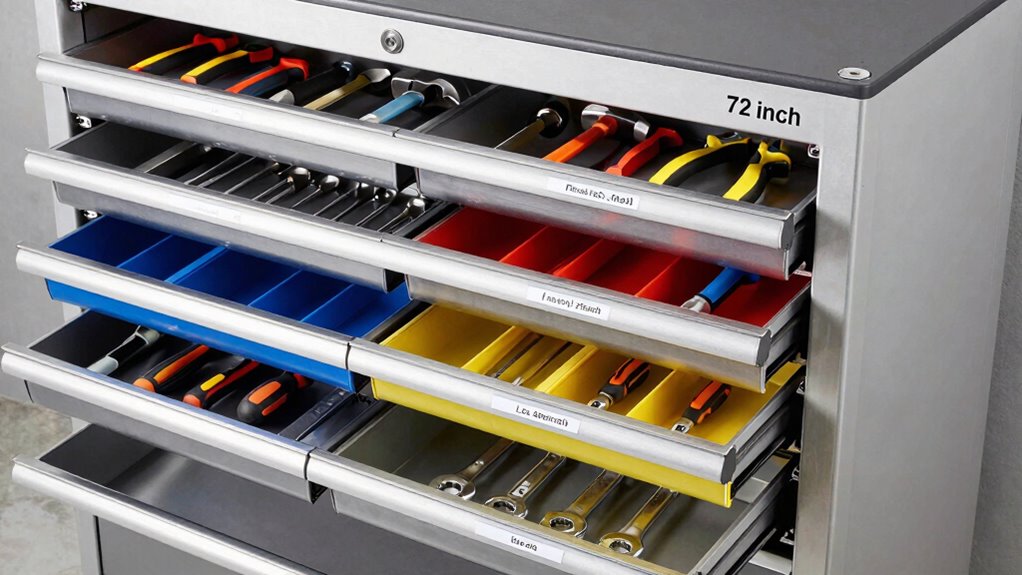
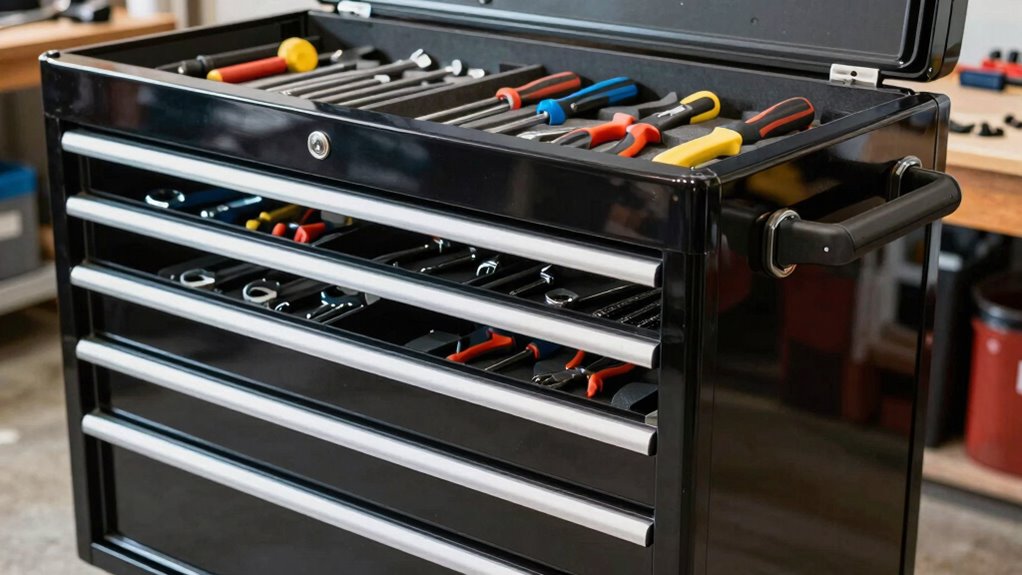
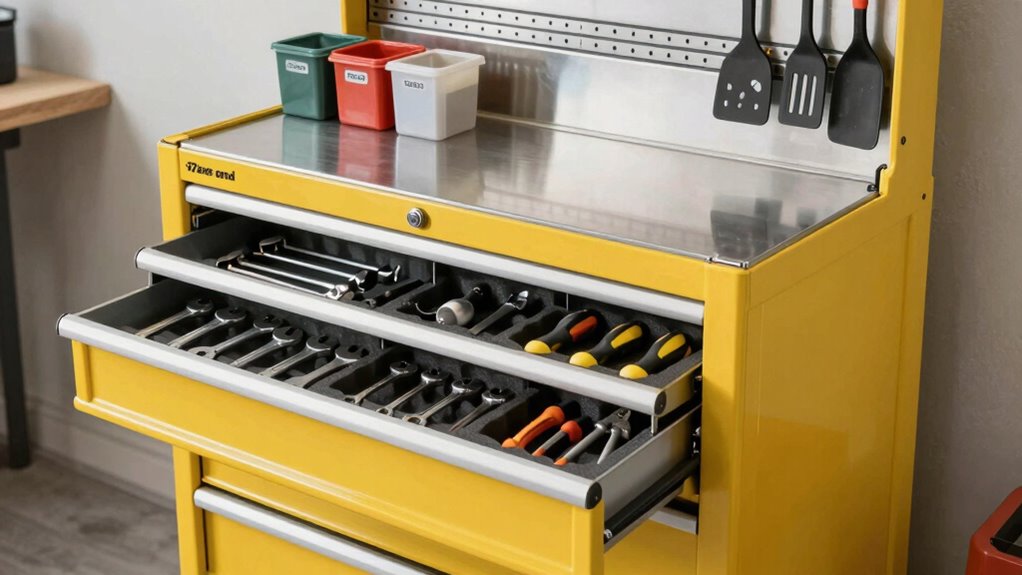
Maximize Space With Dividers, Foam, and Custom Compartments

Maximizing space in your tool chest involves smartly using tool dividers, foam inserts, and custom compartments to keep everything organized and easily accessible. Tool dividers help separate different tool types, preventing clutter and making it simple to find what you need quickly. Foam inserts are ideal for securing delicate or frequently used items, preventing movement and damage during transport or storage. Custom compartments allow you to tailor your chest to fit specific tools or parts, optimizing every inch of space. By combining these elements, you create a streamlined system that reduces search time, protects your tools, and maximizes storage capacity. Properly configured, your tool chest becomes a highly efficient workspace, saving you time and effort during every job.
Use Vertical Storage for Power Tools and Long Items
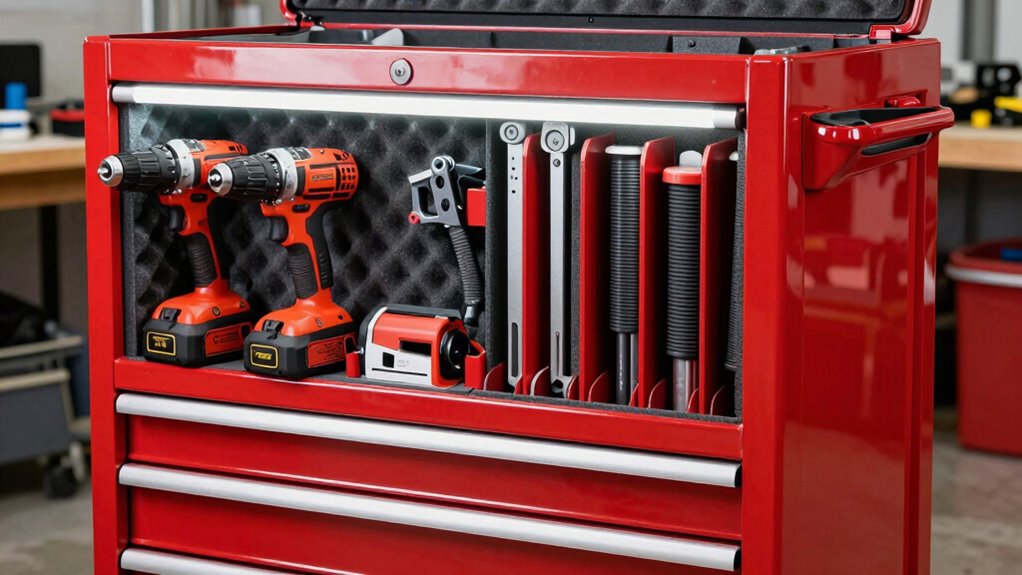
Using vertical storage for power tools and long items helps you save space and stay organized. Maximize your vertical shelving, choose durable bins, and arrange items by length and type. This approach makes it easy to find what you need quickly and keeps your workspace tidy. Additionally, incorporating proper storage techniques can help prevent damage and improve safety in your garage. Implementing ergonomic design principles can further enhance accessibility and reduce strain during use. Paying attention to storage best practices ensures your tools remain in good condition and easily accessible, especially when considering the Gold IRA markets for investment insights. To further optimize your organization, consider customized storage solutions tailored to your specific tool collection and workspace layout.
Maximize Vertical Shelving Space
Vertical shelving is a game-changer for storing power tools and long items efficiently in your tool chest. It helps you utilize every inch of space, keeping your workspace organized and accessible. To maximize this area, consider these tips:
- Use adjustable shelves to fit taller items like pipes or long power tools.
- Incorporate storage containers for small parts, keeping them upright to save space.
- Implement a clear labeling system so you can quickly find what you need without rummaging.
- Store long items vertically, securing them with brackets or straps to prevent falling. Additionally, understanding load calculations helps ensure your shelving can support the weight safely.
Use Durable Storage Bins
Durable storage bins are a practical solution for organizing power tools and long items in your tool chest. They help keep your workspace tidy and protect your tools from damage. When choosing a tool bin, prioritize robustness to ensure it withstands daily use and heavy loads. Good tool bin durability means your bins won’t crack, break, or warp over time, keeping your tools secure and accessible. Use these bins vertically to maximize space and make retrieval easy. Label each bin clearly so you can quickly find the tools you need without rummaging through clutter. Investing in high-quality, durable storage not only prolongs the life of your bins but also keeps your tools organized and safe, making your entire setup more efficient. Additionally, selecting vetted storage solutions ensures you receive reliable and long-lasting organization options.
Organize by Length and Type
Organizing your tools by length and type can considerably improve accessibility and efficiency in your workspace. Vertical storage for power tools and long items keeps them safe, easy to locate, and promotes ergonomic design. To maximize this, consider these strategies:
- Use wall-mounted racks or pegboards for long items like pipes and bars, keeping them upright and accessible.
- Install adjustable tool holders for power tools, ensuring tool safety and quick access.
- Group similar tools by length, such as saw blades or extension cords, for streamlined retrieval.
- Label storage sections clearly to maintain organization and reduce time searching.
This approach minimizes clutter, improves tool safety, and makes your workspace more ergonomic, so you work smarter and safer.
Label Drawers Clearly for Quick Tool Access
Labeling your drawers clearly is essential for quick and efficient tool access. Using effective labeling techniques helps you find what you need without wasting time. Consider incorporating color coding to organize tools by category or frequency of use, which instantly signals where everything belongs. For example, red labels for power tools, blue for hand tools, and green for specialty items create a visual system that’s easy to remember. Use clear, legible fonts and durable labels that won’t peel or smudge over time. Keep labels consistent across drawers to build a logical organization. This approach minimizes clutter and increases productivity, letting you focus on your work instead of searching for tools. Proper labeling transforms your tool chest into a well-oiled, accessible system.
Set Up a Routine to Maintain and Rotate Your Tools
To keep your tool chest functioning smoothly, establishing a routine for maintenance and rotation is essential. Regular tool maintenance prevents rust, dull blades, and broken parts, ensuring safety protocols are always followed. Rotate tools based on usage; frequently used items should be easily accessible, while seldom-used tools can be stored deeper.
Consider these steps:
- Inspect tools weekly for damage or wear.
- Clean and lubricate tools after each use.
- Sharpen blades and replace worn parts promptly.
- Reorganize tools to match your current projects and workflow.
Adopting this routine helps you catch issues early, prolongs the lifespan of your tools, and maintains a safe, efficient workspace. Consistent upkeep keeps your tool chest reliable and ready for any task.
Customize Your Setup for Your Projects and Workflow
After establishing a routine for tool maintenance and rotation, the next step is to tailor your setup to fit your specific projects and workflow. Organize tools based on how you work to improve efficiency and tool safety. Keep frequently used items within easy reach, reducing unnecessary movement and strain. Incorporate ergonomic design principles by adjusting tool placement and height to prevent fatigue and injury. Use labels or clear containers to streamline your process and ensure everything has a dedicated spot. Prioritize safety by storing sharp or hazardous tools securely, and consider anti-slip mats or cushioned areas for comfort. Customizing your setup helps you work smarter, reduces clutter, and creates a safer, more productive environment aligned with your unique project needs.
Keep Your Organization System Fresh and Adapt Over Time
As your projects and tools evolve, so should your organization system; regularly reviewing and updating your setup keeps it effective and relevant. To maintain ideal tool maintenance and storage aesthetics, schedule periodic assessments of your tool chest. Here are four ways to keep your system fresh and adaptable:
Regularly review your tool organization to stay efficient and keep your workspace fresh.
- Reevaluate tool placement for better workflow.
- Declutter by removing unused or worn tools.
- Refresh storage labels and dividers for clarity.
- Adjust your setup to incorporate new tools or projects.
Frequently Asked Questions
How Often Should I Reorganize My Tool Chest for Optimal Efficiency?
You should reorganize your tool chest every 3 to 6 months to maintain peak efficiency. Regular maintenance tips like decluttering and sorting tools by frequency of use help prevent clutter. Organizational tips such as labeling drawers and using compartmentalized trays make finding tools quick and easy. Staying consistent with these practices ensures your workspace remains efficient, safe, and ready for any project. Adjust frequency based on how often you work or if your tools change.
What Are the Best Materials for Durable Drawer Dividers?
Did you know that metal dividers can last over a decade with proper care? For durability, metal dividers are excellent because they resist damage and keep tools secure. Foam inserts also work well, providing cushioning and preventing scratches. Both materials are top choices, but if you want longevity, go with metal dividers, especially if you’re organizing heavy tools. Foam inserts are perfect for delicate or frequently used items.
How Can I Prevent Tools From Shifting During Transport?
To prevent tools from shifting during transport, you should use tool cushioning and anti-slip mats inside your chest. Secure larger tools with straps or bungee cords, and place smaller items in compartments with foam inserts or drawer liners. Anti-slip mats keep everything in place and absorb shocks, reducing movement. Make sure everything is tightly packed, and double-check that no items can slide around during transit for maximum safety.
What Security Options Are Recommended for Locking a Rolling Chest?
Locking your rolling chest is like securing a treasure chest—you want reliable protection. Use sturdy locking mechanisms, such as high-quality padlocks or built-in key locks, to deter theft. For extra security, consider alarm systems that trigger if someone tries to tamper with it. I once saw a shopowner install an alarm on his chest, and it stopped a theft attempt instantly, proving how essential these options are for peace of mind.
How Do I Incorporate Electrical Outlets Into My Tool Chest Setup?
To incorporate electrical outlets into your tool chest, start with power outlet installation by planning outlet locations for easy access. Use a dedicated power strip or install built-in outlets with proper wiring safety, ensuring all connections are grounded and protected from moisture. Hire a professional if needed, and double-check local electrical codes. This setup keeps your workspace efficient and safe, giving you quick power access right at your work surface.
Conclusion
So there you have it—your foolproof plan to turn that chaotic tool chest into a well-oiled masterpiece. With a little effort, some labels, and a touch of genius, you’ll be the envy of every pro shop. Just remember, if your tools start organizing themselves, you might be doing something right. Or maybe you’ve discovered the secret to tool magic. Either way, enjoy the chaos-free workspace—you’ve earned it!