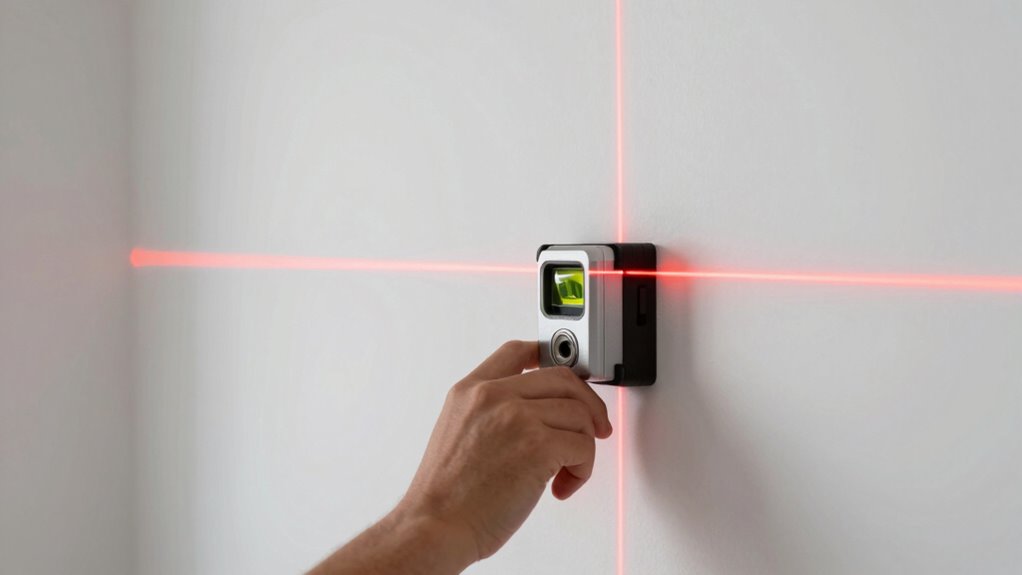

Using a laser level is the quickest way to create perfectly straight lines for accent walls. Set it up on a stable surface or mount it securely, then calibrate it for accuracy. As the laser projects a clear, visible line across your wall, mark your reference points and confirm the laser is level. This method saves time, improves precision, and makes your wall projects look professional. Keep exploring to learn more tips and tricks for flawless results.
Key Takeaways
- Use a self-leveling laser level for quick, accurate straight lines with minimal setup.
- Mount the laser on a stable tripod or bracket for consistent, straight projections.
- Align the laser line with existing reference points or marks on the wall for precision.
- Ensure surfaces are clean and flat to maintain sharp, clear laser lines.
- Regularly calibrate and check the laser level to ensure ongoing accuracy during the project.
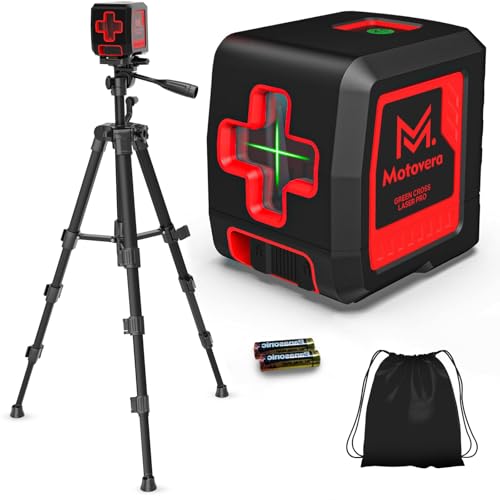
Motovera Self Leveling Laser Level 100ft, Green Cross Line with Tripod, 4 Brightness Modes & Pulse Function, Manual & Self-Leveling Modes, IP54 Waterproof for Picture Hanging, Tile, DIY Construction
【Ultra-Bright Green Beam & High-Precision Accuracy】Powered by an advanced green laser diode, this tool delivers 4X the brightness…
As an affiliate, we earn on qualifying purchases.
As an affiliate, we earn on qualifying purchases.
What Is a Laser Level and How Does It Work?
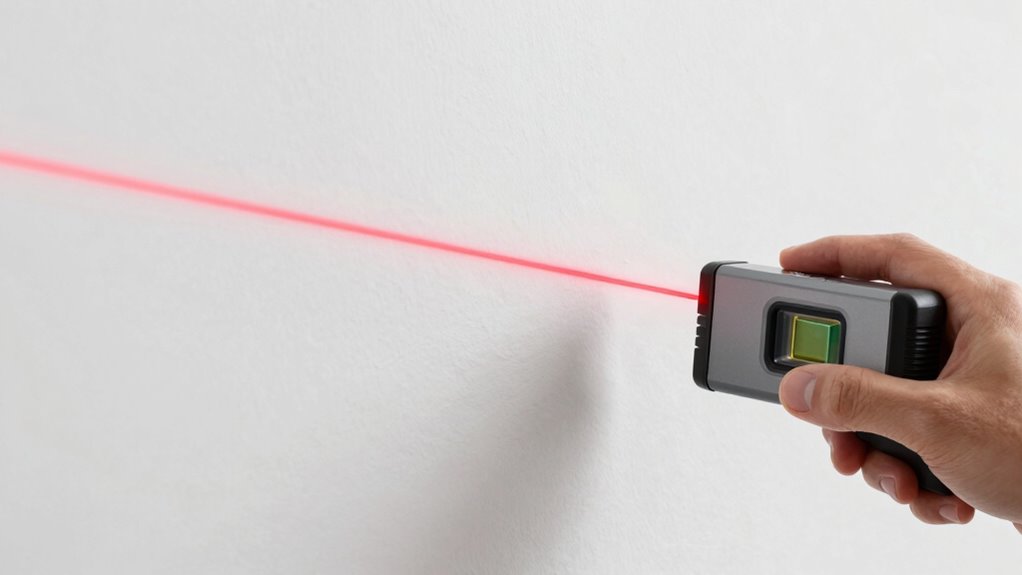
Have you ever wondered how professionals achieve perfectly straight lines in construction or home improvement projects? That’s where a laser level comes in. It uses laser technology to project a straight, visible line across surfaces, ensuring precision every time. The core principle is measurement accuracy; laser levels emit a laser beam that creates a reliable reference line, even over long distances. These devices can be self-leveling or manual, depending on your needs, automatically adjusting to ensure the line stays true. They’re incredibly versatile, ideal for hanging shelves, installing tiles, or accent walls. By combining advanced laser technology with high measurement accuracy, laser levels make it easy for you to achieve straight, professional results without guesswork or manual chalk lines. Understanding measurement accuracy is fundamental to mastering precise line work in many projects. Additionally, many modern laser levels incorporate smart features such as automatic calibration and cross-platform integration to enhance usability and precision. Proper setup and calibration are essential steps to ensure optimal performance and accuracy in your projects. Furthermore, leveraging European cloud solutions can improve the data management and connectivity of your laser levels, ensuring seamless operation and updates.

DEGLASERS Laser Level Tripod,1/4"-20 Thread Mount,18" Lightweight Aluminum Portable Adjustable Tripod with 3-Way Flexible Pan Head, Bubble Level, Non-Skid Feet, Carrying Pouch Included,Black
Four Adjustable Extension Lengths: TThe tripod offers four different reach lengths, ranging from 17 inches to 52 inches,…
As an affiliate, we earn on qualifying purchases.
As an affiliate, we earn on qualifying purchases.
Which Types of Laser Levels Are Best for Accent Walls?
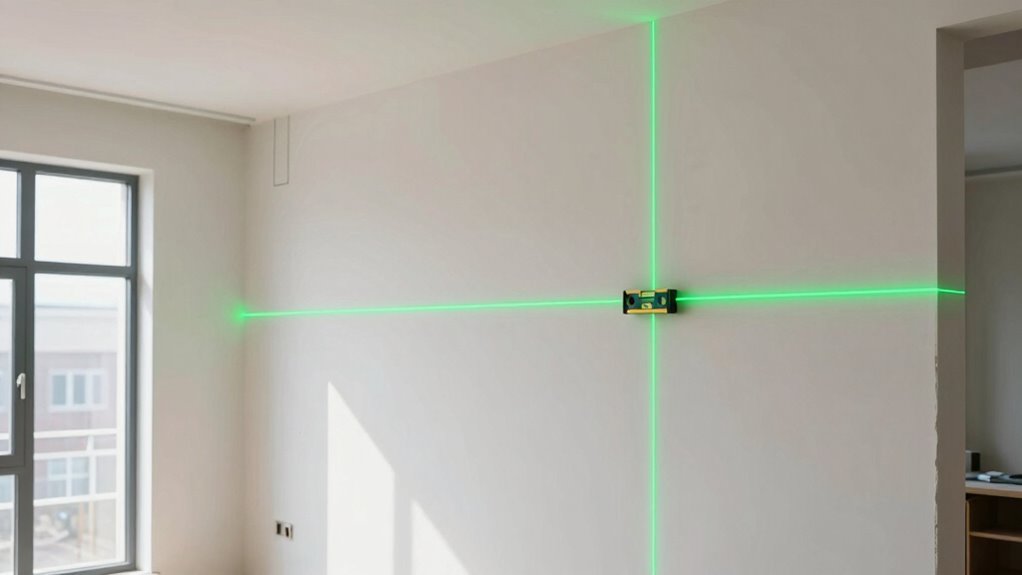
When choosing a laser level for accent walls, you’ll want to contemplate models that offer both versatility and ease of use. For this, self-leveling laser levels are ideal because they quickly project straight lines with minimal setup. Brands like Bosch, DeWalt, and Leica are trusted for their accuracy and durability, making them reliable choices. You should also consider laser level safety features, such as protective housing and clear visibility, to prevent accidents or eye injuries. Green laser levels are often brighter and easier to see in well-lit rooms, but always wear appropriate laser safety glasses. For accent walls, a combination of line and point lasers from reputable brands ensures you get precise, clean lines without hassle. This blend of features helps you achieve professional-looking results efficiently. Additionally, understanding basic wiring basics can help in setting up more complex laser level systems or troubleshooting common issues. Incorporating projector technology insights can also be beneficial if you plan to integrate laser levels with digital tools for layout planning. Moreover, familiarizing yourself with navigation and mapping features can enhance your accuracy when working on larger or more complex wall designs. A deeper understanding of laser calibration methods can also ensure consistent precision over time. Knowing how to perform proper calibration techniques can prevent misalignments and maintain accuracy across use.
Motovera Self Leveling Laser Level 100ft, Green Cross Line with Tripod, 4 Brightness Modes & Pulse Function, Manual & Self-Leveling Modes, IP54 Waterproof for Picture Hanging, Tile, DIY Construction
【Ultra-Bright Green Beam & High-Precision Accuracy】Powered by an advanced green laser diode, this tool delivers 4X the brightness…
As an affiliate, we earn on qualifying purchases.
As an affiliate, we earn on qualifying purchases.
How to Set Up Your Laser Level for Perfectly Straight Lines
To get perfectly straight lines, start by choosing a stable surface that won’t wobble. Next, securely set up your laser level so it doesn’t shift during use. Finally, align the laser line carefully to make certain your markings are accurate and straight.
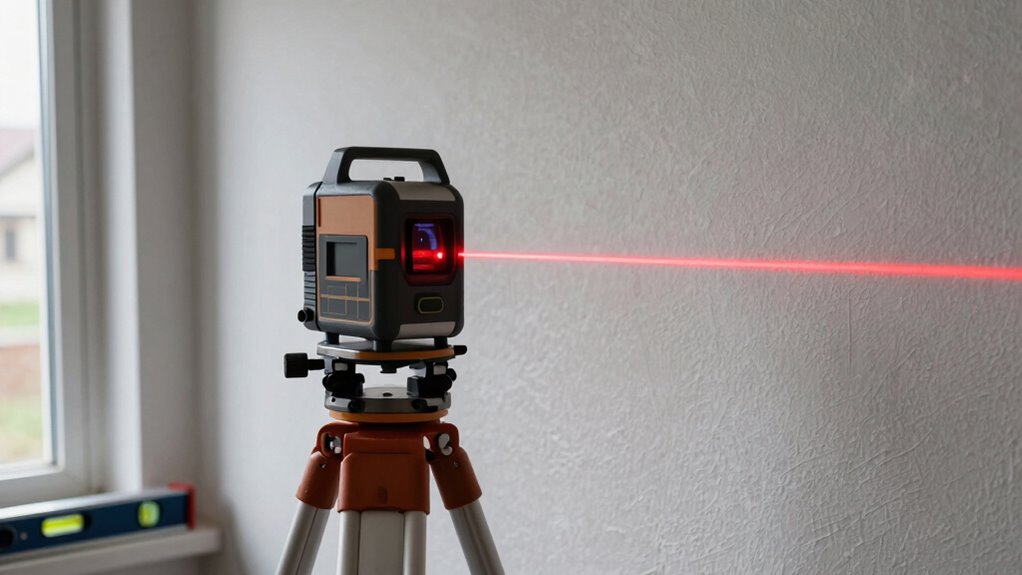
Choose the Right Surface
Choosing the right surface is essential for achieving a perfectly straight line with your laser level. Surface texture plays a key role—smooth, flat surfaces help the laser beam project clearly, while rough or textured surfaces can distort the line. Look for materials that are compatible with your laser level; for example, drywall, painted walls, and smooth wood work well, but uneven or shiny surfaces may require additional adjustments. Before starting, clean the surface to remove dust or debris that could interfere with visibility. Avoid reflective or highly glossy surfaces, as they can cause glare or misalignment. Selecting an appropriate surface ensures your laser line remains sharp and accurate, making your project easier and more precise.
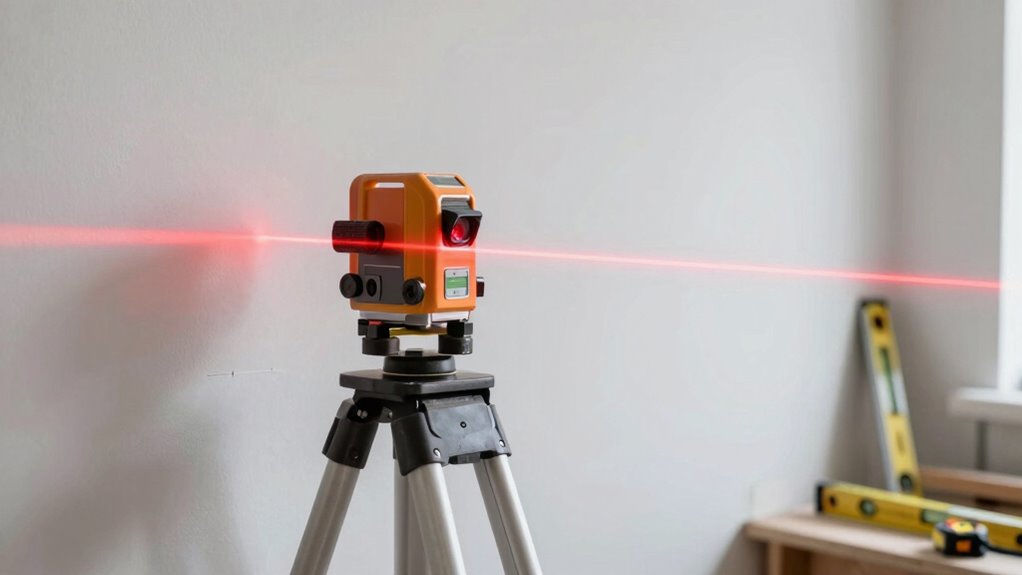
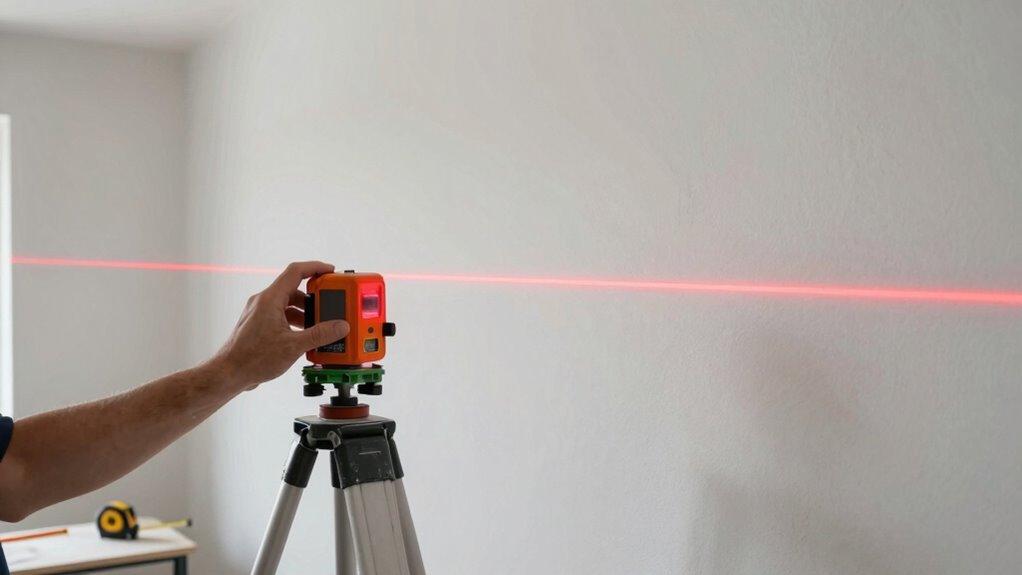
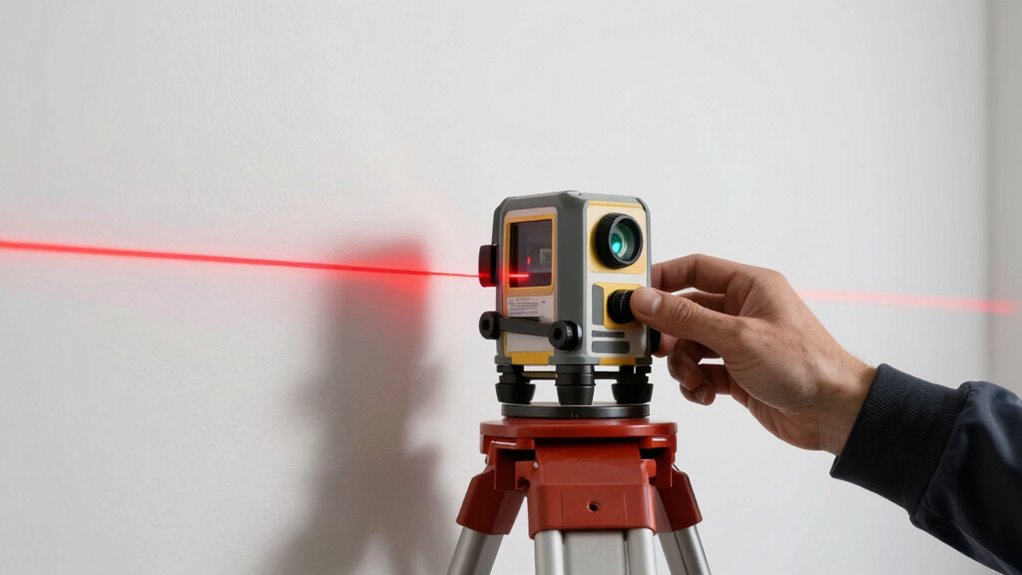
Secure the Laser Level Properly
Ensuring your laser level is securely set up is key to achieving perfectly straight lines. Start by attaching the laser to mounting brackets that provide a stable connection. If you’re using a tripod, make sure it’s on a flat surface and fully extended to maximize stability. Tighten all tripod adjustments securely to prevent any shifting during operation. Check that the laser level is mounted firmly and isn’t wobbling or tilting. Proper tripod stability minimizes movement and maintains accuracy. If your laser level includes a mounting bracket, ensure it’s locked in place and properly aligned before turning it on. A stable setup eliminates common errors caused by equipment shifting, giving you a reliable reference point for precise, straight lines on your accent wall. Additionally, verifying the stability of your setup regularly helps maintain consistent accuracy throughout your project. Remember that proper setup is essential for achieving professional-looking results and avoiding rework. Regularly inspecting your equipment for firmness is a simple step to ensure ongoing precision. Maintaining equipment stability also helps prevent misalignments that can occur over time or with minor disturbances.
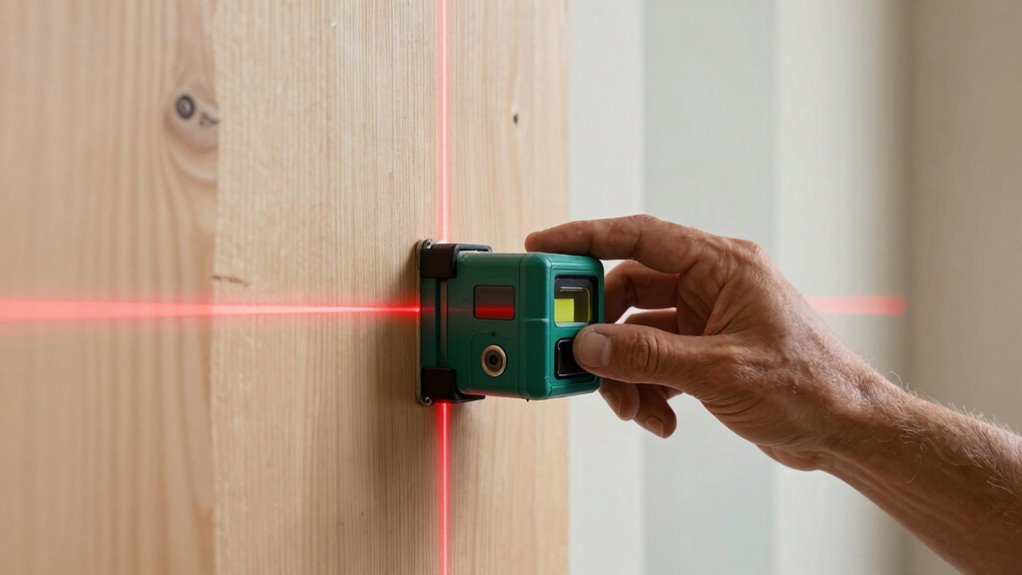
Align the Laser Line
How can you guarantee your laser line is perfectly straight? The key is precise alignment using your chosen mounting options and visual cues. Start by positioning your laser level securely on a stable surface or tripod. Use the built-in bubble vials or electronic level to ensure the device is perfectly level. Then, adjust until the laser line aligns visually with reference points on your wall—like existing lines or marks. Consider this quick reference table:
| Mounting Option | Visual Alignment Tip | Best Use Case |
|---|---|---|
| Tripod | Use bubble level for precision | Large areas, ceilings |
| Mounting bracket | Align laser with a reference line | Fixed installations |
| Magnetic mount | Ensure magnetic base is level | Metal surfaces |
This guarantees your laser line is true, straight, and ready for perfect wall accenting.

FreeMascot IPL 200nm-2000nm Laser Safety Glasses for Laser Hair Removal Treatment and Laser Cosmetology Operator Eye Protection with Case (Green)
Wavelength: 200nm-2000nm, broad spectrum protection, block UV, Blue, Red and Infrared Laser Light
As an affiliate, we earn on qualifying purchases.
As an affiliate, we earn on qualifying purchases.
How to Align and Calibrate Your Laser Level for Best Results

To guarantee your laser level delivers accurate results, you’ll need the right calibration tools and proper leveling techniques. Start by gathering the necessary equipment, such as a calibration target or spirit level, and follow the manufacturer’s instructions. With these tools and techniques, you’ll keep your laser level perfectly aligned for the best accuracy. Additionally, understanding piercing care and hygiene can help prevent issues that could affect your project’s precision. Incorporating landscaping principles can also help ensure your space is designed with precision, which complements proper laser leveling practices. Regularly checking the energy efficiency of your tools can also help maintain consistent performance over time. Performing routine tool calibration ensures ongoing accuracy and reduces the likelihood of costly mistakes.
Calibration Tools Needed
Proper calibration of your laser level requires the right tools to achieve accurate alignment. A bubble level is essential to verify that your laser is perfectly horizontal or vertical. Additionally, a calibration gauge helps guarantee your device’s internal mechanisms are precise. These tools work together to prevent errors that could ruin your project. Here’s a quick overview:
| Tool | Purpose |
|---|---|
| Bubble Level | Checks for horizontal/vertical alignment |
| Calibration Gauge | Adjusts laser accuracy |
| Tripod | Provides stable positioning |
| Spirit Level | Ensures surface is level |
| Laser Detector | Detects laser at a distance |
Using these tools, you can confidently calibrate your laser level for flawless results. Proper calibration techniques ensure your lines stay straight and aligned throughout your project, and understanding how to maintain your equipment can extend its lifespan.
Proper Leveling Techniques
Achieving accurate alignment with your laser level starts with careful setup and calibration. Proper leveling techniques ensure measurement accuracy, which is essential for straight lines and precise placement. Begin by placing your laser level on a stable surface or mounting it securely. Use the built-in bubble vials or electronic sensors to check for levelness, adjusting the device until they indicate perfect alignment. If your laser level has calibration functions, follow the manufacturer’s instructions to fine-tune its precision. Always double-check the level’s calibration before starting your project, especially if you’ve moved it or experienced any bumps. Consistent application of proper leveling techniques guarantees measurement accuracy, making your lines perfectly straight and saving time on corrections later. Proper setup is the foundation of professional-looking results. Leveraging device calibration can help you understand the importance of precise positioning and alignment in various applications. Remember, maintaining measurement accuracy throughout your project is key to achieving the best results.
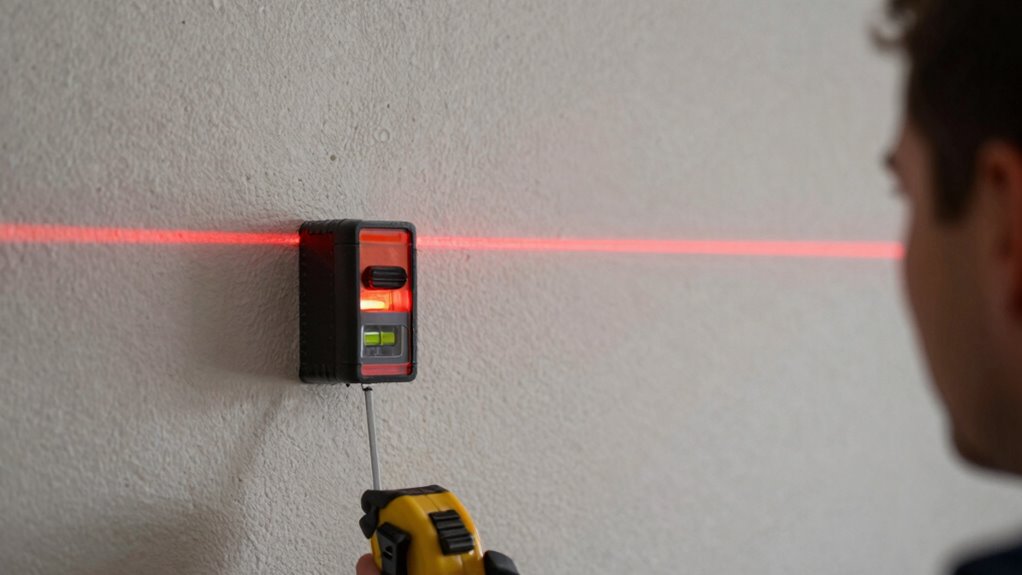
How to Use a Laser Level to Mark and Transfer Lines Accurately
Using a laser level to mark and transfer lines accurately is straightforward once you understand the proper technique. Begin by positioning the laser level on a stable surface or mounting it securely. Use your marking techniques to identify the exact points where the laser beam intersects your surfaces. For transfer methods, mark the laser lines clearly with a pencil at key points, ensuring they are easy to see and measure. If the laser line is continuous, you can simply trace it with a pencil or tape measure. For precise transfer, measure distances from known reference points to the laser line, then replicate these measurements on your wall. This method ensures your lines are straight, level, and perfectly aligned for your accent wall project.
Common Laser Level Issues and How to Fix Them
Even with careful setup and alignment, laser level issues can still pop up, affecting the accuracy of your lines. One common problem is a drained battery, which reduces laser brightness and precision. To fix this, replace or recharge the batteries regularly to maintain ideal laser safety and performance. Additionally, if your laser appears off-level, check for surface stability or calibration issues. Dirt or debris on the lens can also cause inaccuracies; clean the lens gently with a soft cloth. Always confirm your laser level is properly secured and use it in a safe environment, avoiding direct eye exposure. Here’s a quick troubleshooting guide:
| Issue | Solution |
|---|---|
| Low battery life | Replace or recharge batteries |
| Laser off-level | Recalibrate or check surface stability |
| Lens dirt | Clean lens with a soft cloth |
| Laser flickering | Check for loose parts or electrical issues |
How to Maintain and Care for Your Laser Level
Proper maintenance and care are essential to keep your laser level functioning accurately and prolong its lifespan. Regular battery maintenance ensures consistent power and prevents leaks or corrosion; remove batteries if you won’t use the tool for an extended period. Check and replace batteries as needed, and clean contacts with a dry cloth. Store your laser level in a cool, dry place to protect it from dust, moisture, and temperature extremes. Use designated storage cases or padded containers to prevent accidental damage. Keep the device away from direct sunlight and extreme humidity, which can affect internal components. Following these storage practices and maintaining your batteries will keep your laser level reliable and ready for precise measurements whenever you need them.
Tools and Accessories to Improve Laser Level Accuracy
To maximize the accuracy of your laser level, incorporating specific tools and accessories can make a significant difference. Laser level accessories like target plates, mounting brackets, and laser detectors help enhance precision and ease of use. Calibration tools are essential for maintaining accuracy over time, ensuring your device stays true to its measurements. Proper calibration prevents errors that could compromise your lines, especially on large projects. Using these accessories and tools simplifies setup and improves results.
| Tool/Accessory | Purpose |
|---|---|
| Laser level accessories | Improve alignment and visibility |
| Calibration tools | Ensure ongoing measurement accuracy |
| Mounting brackets | Secure the laser level for stability |
Tips for Achieving Flawless Accent Walls With Laser Level Techniques
Achieving a flawless accent wall with laser level techniques starts with meticulous planning and precise setup. First, coordinate your wall color with existing decor to ensure harmony, considering how the new paint will complement furniture placement and room flow. Use your laser level to mark straight lines at the right height, double-checking alignment with your planned furniture arrangement. This prevents missteps that could disrupt the room’s balance. Keep the laser level steady and calibrated for accuracy, and consider taping guide lines as a backup. Take your time to adjust for natural light and shadows, which can affect your perception of straightness. By paying attention to color matching and furniture placement, you’ll guarantee your accent wall looks intentional, balanced, and flawless from every angle.
Frequently Asked Questions
Can Laser Levels Be Used Outdoors in Bright Sunlight?
Yes, you can use laser levels outdoors in bright sunlight, but solar glare can make laser visibility a challenge. To improve accuracy, choose laser levels with green beams, which are more visible in sunlight, or use laser enhancement accessories like glasses or detectors. Position yourself in shaded areas when possible, and guarantee the laser is at a high enough level to be less affected by sunlight, so your lines stay precise.
What Safety Precautions Should I Follow When Using a Laser Level?
Did you know that over 80% of laser eye injuries occur due to improper use? When using a laser level, always wear eye protection to prevent accidental exposure. Make certain your workspace is clear of bystanders and obstacles to avoid accidents. Never look directly into the laser beam, and keep it at eye level when in use. Following these safety precautions keeps your project safe and your eyes protected.
How Long Do Laser Level Batteries Typically Last?
Your laser level’s battery lifespan varies based on the model and power options, but generally, you can expect around 4 to 8 hours of use on a full charge. Some units offer rechargeable batteries, while others use replaceable AA batteries. To maximize runtime, choose a model with efficient power options and carry spare batteries. Always check your laser level’s specifications for the most accurate battery lifespan details.
Are There Any DIY Tricks to Improve Laser Level Accuracy?
Imagine a laser beam as steady as a mountain stream—you can enhance its accuracy with simple DIY tricks. Start with calibration tips like checking the laser’s level regularly and adjusting it as needed. Use precise mounting techniques, such as mounting on a solid surface or using a tripod, to keep the laser steady. These small steps help guarantee your laser level stays accurate, making your accent walls perfectly straight every time.
Can Laser Levels Be Used for Ceilings or Only Walls?
Yes, you can use laser levels for ceiling applications as well as wall alignment. They’re versatile tools that help you achieve straight lines across horizontal surfaces, making your ceiling projects easier and more precise. Just guarantee your laser level is set securely and calibrated correctly. Whether you’re installing crown molding or hanging ceiling fixtures, laser levels give you accurate guidance, saving time and reducing errors in both ceiling and wall projects.
Conclusion
Using a laser level can boost your accuracy and speed, making it easier to achieve perfect accent walls. Did you know that DIYers using laser levels report a 50% reduction in measurement errors? With the right tools and techniques, you’ll save time and avoid costly mistakes. So, invest in the right laser level and follow these tips—you’ll be amazed at how professional your walls look with just a little effort!