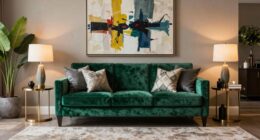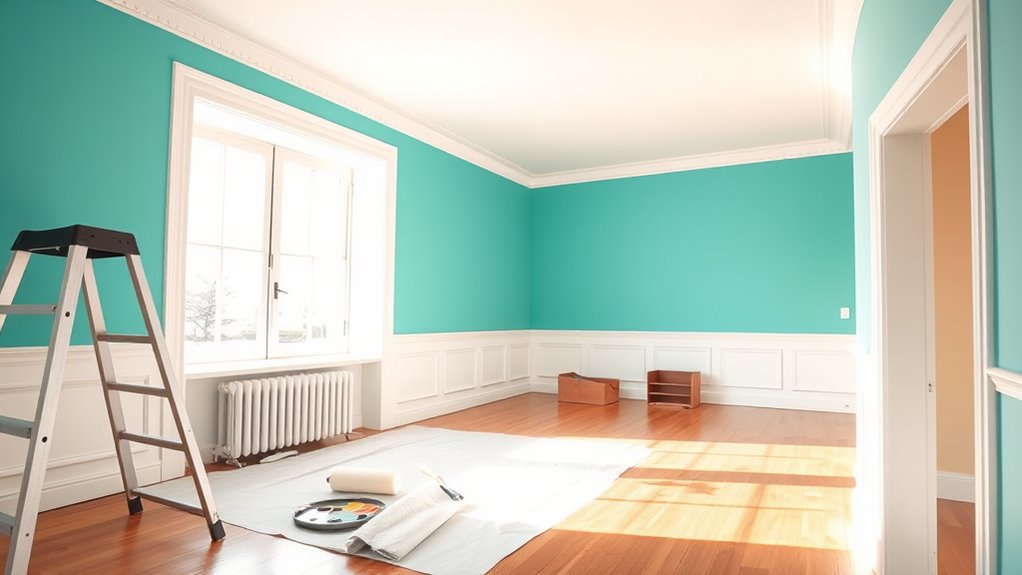

You can easily upgrade your space in a weekend by choosing a fresh color palette with shades that complement your decor and mood, then applying a bold accent wall for instant impact. Use high-quality tools like brushes and rollers to guarantee smooth coverage, and add finishing touches like stencils or decals for personalized detail. These simple steps transform your room quickly—keep going for more clever tips to make your DIY project truly stand out.
Key Takeaways
- Create an accent wall using bold paint, textured finishes, or geometric patterns for instant visual impact.
- Refresh space with new wall decals or decorative stencils for a personalized touch.
- Choose a cohesive color palette and update trim or baseboards for a polished look.
- Use high-quality brushes and rollers suited for your chosen finishes to ensure smooth coverage.
- Incorporate lighting adjustments or decorative elements to enhance the overall aesthetic quickly.

Pro Grade Paint Roller Kit, Brush & Roller,10 Piece Set, Wall Painting Naps for Professionals & Homeowners – All Paints & Stains, Washable, Reusable, Easy to Clean, Superior Absorbency.
WHAT'S IN THIS 10 PIECE PAINT KIT FOR WALLS: includes one plastic paint tray; one 9 inch roller…
As an affiliate, we earn on qualifying purchases.
As an affiliate, we earn on qualifying purchases.
Choosing the Perfect Color Palette and Tools

Selecting the right color palette and tools is essential for a successful DIY painting project. Understanding color theory helps you choose hues that complement your space and evoke the desired mood. Stick to a cohesive palette by selecting shades within the same color family or contrasting tones for visual interest. When it comes to paint finishes, consider the function of each room; matte finishes hide imperfections, while semi-gloss adds durability for high-traffic areas. Choose high-quality brushes and rollers suited for your chosen finishes to ensure smooth, even coverage. Investing in the right tools minimizes mess and saves time. Additionally, keto diet tracking can help you stay organized and monitor your progress throughout the project. Paying attention to the architectural significance of your space can guide your color choices to highlight unique features. Exploring painting techniques can further enhance your final look and add professional touches to your work. Incorporating knowledge about lighting conditions in your space can influence how colors appear once applied, ensuring your chosen palette looks great in different lighting. With thoughtful selection of colors and finishes, you’ll set a strong foundation for a professional-looking result, making your weekend upgrade both satisfying and visually striking. Both the choice of color schemes and quality tools can significantly influence the overall success of your project.

SHYJSHYJ 6 Pack 14'' Modern Herringbone Geometric Brick Hexagon Boho Lines Wall Stencils for Painting Large Pattern on Wall, Reusable Decorative Template for Scandinavian Painting Wall Décor
EASY TO USE: Our wall stencil is incredibly easy to use, even for those who have never used…
As an affiliate, we earn on qualifying purchases.
As an affiliate, we earn on qualifying purchases.
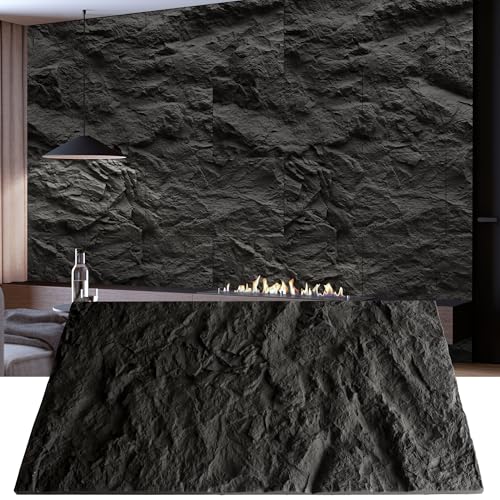
Creating an Accent Wall for Visual Impact

An accent wall instantly transforms a room by adding visual interest and depth. To achieve this, choose a bold color or pattern that complements your overall decor. Instead of traditional wallpaper, consider wallpaper alternatives like textured wall panels or fabric wall coverings for a unique look. You can also use wall texture techniques such as sponging, rag rolling, or applying a faux finish to create dimension. To enhance your accent wall, think about adding:
- Geometric stencils or decals for modern flair
- Vertical or horizontal stripes for visual elongation or width
- Metallic or matte paint finishes for subtle sophistication
- Hand-painted murals or designs for a personalized touch
These options allow you to craft a striking focal point without overwhelming the space. Incorporating design principles such as balance and harmony can help prevent your accent wall from clashing with existing decor, ensuring a cohesive look. Additionally, exploring remote hackathons can inspire innovative ideas for DIY projects or creative decor solutions that you might incorporate into your design process. For an extra layer of impact, consider experimenting with color psychology to select hues that evoke the desired mood or ambiance in your room. A thoughtful approach to incorporating interior design elements can further elevate your decor and create a truly personalized space.

Black Vinyl Wall Sticker Wall Word Quotes Bless This Home and All who Enter Wall Decals Flowers Butterfly Wall Decor Sticker for Entryway Living Room Home Decor.
Warm quotes design: our wall sticker is print with [Bless This Home and All who Enter], the letter…
As an affiliate, we earn on qualifying purchases.
As an affiliate, we earn on qualifying purchases.
Finishing Touches to Enhance Your Painted Space

Once you’ve applied your paint and created an eye-catching accent wall, the final step is to add finishing touches that elevate the overall look. Decorative stencils are a quick way to add intricate patterns or borders that complement your wall color. Simply tape them in place and dab or roll paint over the design for a professional touch. Wall decals are another easy upgrade; they come in various shapes and themes, allowing you to customize your space effortlessly. Apply decals directly to your painted walls to create focal points or add visual interest without mess. These finishing touches require minimal effort but make a significant impact, transforming a simple paint job into a polished, personalized space you’ll love. For optimal results, consider support hours to plan your project around when supplies are most accessible. Incorporating visual representation techniques can also add a unique touch that enhances your decor’s overall aesthetic. Additionally, exploring skincare benefits can help you maintain a refreshed and youthful appearance as you enjoy your newly upgraded space in comfort.
KASARO 3D Faux Stone Wall Panels, 4 PCS PU Wainscoting Panel for Interior Wall Decor, Cement Texture Thicker Accent for Home, Office, 43.3 × 23.6 inch, Black
Enhanced 3D Design: KASARO PU 3D Wall Panels feature a thick, deep relief design that delivers striking three-dimensional…
As an affiliate, we earn on qualifying purchases.
As an affiliate, we earn on qualifying purchases.
Frequently Asked Questions
How Can I Prevent Paint From Dripping During Application?
To prevent paint from dripping during application, focus on proper brush techniques and paint consistency. Use a high-quality brush and avoid overload by dipping just the tip of the brush, then wipe excess off. Keep the paint at a smooth, medium consistency—not too thick or thin. Apply thin, even coats, and work steadily, which helps control drips and results in a cleaner, professional finish.
What Is the Best Way to Clean Brushes After Painting?
Imagine your brushes, coated in fresh paint, waiting for their next use. To keep them in prime condition, you’ll want to focus on proper brush maintenance. Start by rinsing your brushes immediately after painting with warm water and gentle cleaning solutions like soap or specialized brush cleaners. Gently work the solution through the bristles, then reshape and let them dry flat. This keeps your brushes in top shape for future projects.
How Do I Fix Uneven Paint Lines or Streaks?
To fix uneven paint lines or streaks, start by letting the paint dry completely. Use a damp, high-quality brush to gently smooth out streaks with light brush techniques, avoiding overworking the area. Carefully remove painter’s tape, pulling it back slowly at a 45-degree angle. If needed, touch up with a small brush for sharp, clean lines. Patience and precise tape application make all the difference for professional-looking results.
Can I Use Regular Wall Paint on Furniture or Other Surfaces?
You can use regular wall paint for furniture or other surfaces, but proper surface prep is crucial. Before painting furniture, clean and sand the surface to guarantee good adhesion. Use a primer if needed, especially on smooth or glossy surfaces. Keep in mind that wall paint might not be as durable as furniture-specific paint, so expect some chipping or wear over time. For best results, choose a paint designed for furniture or cabinetry.
How Long Should I Wait Before Moving Furniture Back After Painting?
Time flies when you’re eager to move furniture back, but patience is key. You should wait at least 24 to 48 hours before rearranging furniture after painting, allowing proper drying time. This prevents smudges or dents, and ensures your paint job stays pristine. When planning furniture placement, keep in mind the drying process, so your freshly painted walls can breathe and set fully before adding any weight or movement.
Conclusion
With a little effort and the right choices, you can transform your space in just a weekend. Picking the perfect colors, adding an accent wall, and finishing with thoughtful touches will make a big difference. Remember, Rome wasn’t built in a day, but you can certainly give your room a fresh new look in a weekend. So roll up your sleeves and enjoy the satisfying feeling of a DIY upgrade—beauty is just a brush stroke away!