TL;DR
Moving your rig into a closet and treating it properly can drastically improve sound quality and reduce noise without expensive soundproofing. Placement, ventilation, and strategic treatment are your best tools for a quiet, professional-sounding setup.
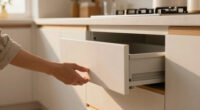
Ever wondered if your tiny closet could become a serious recording booth? The secret isn’t just adding foam or blankets — it’s about where you place your gear and how you treat the space. Moving your rig into a closet, with the right tweaks, can turn a noisy mess into a quiet, reflection-free zone. Learn more about acoustic treatment.
In this guide, you’ll learn how to optimize your closet studio with smart placement, effective dampening, and ventilation tricks. These steps are often overlooked but can make a world of difference in your recordings and overall noise levels.
Acoustic dampening
& the rig in the closet.
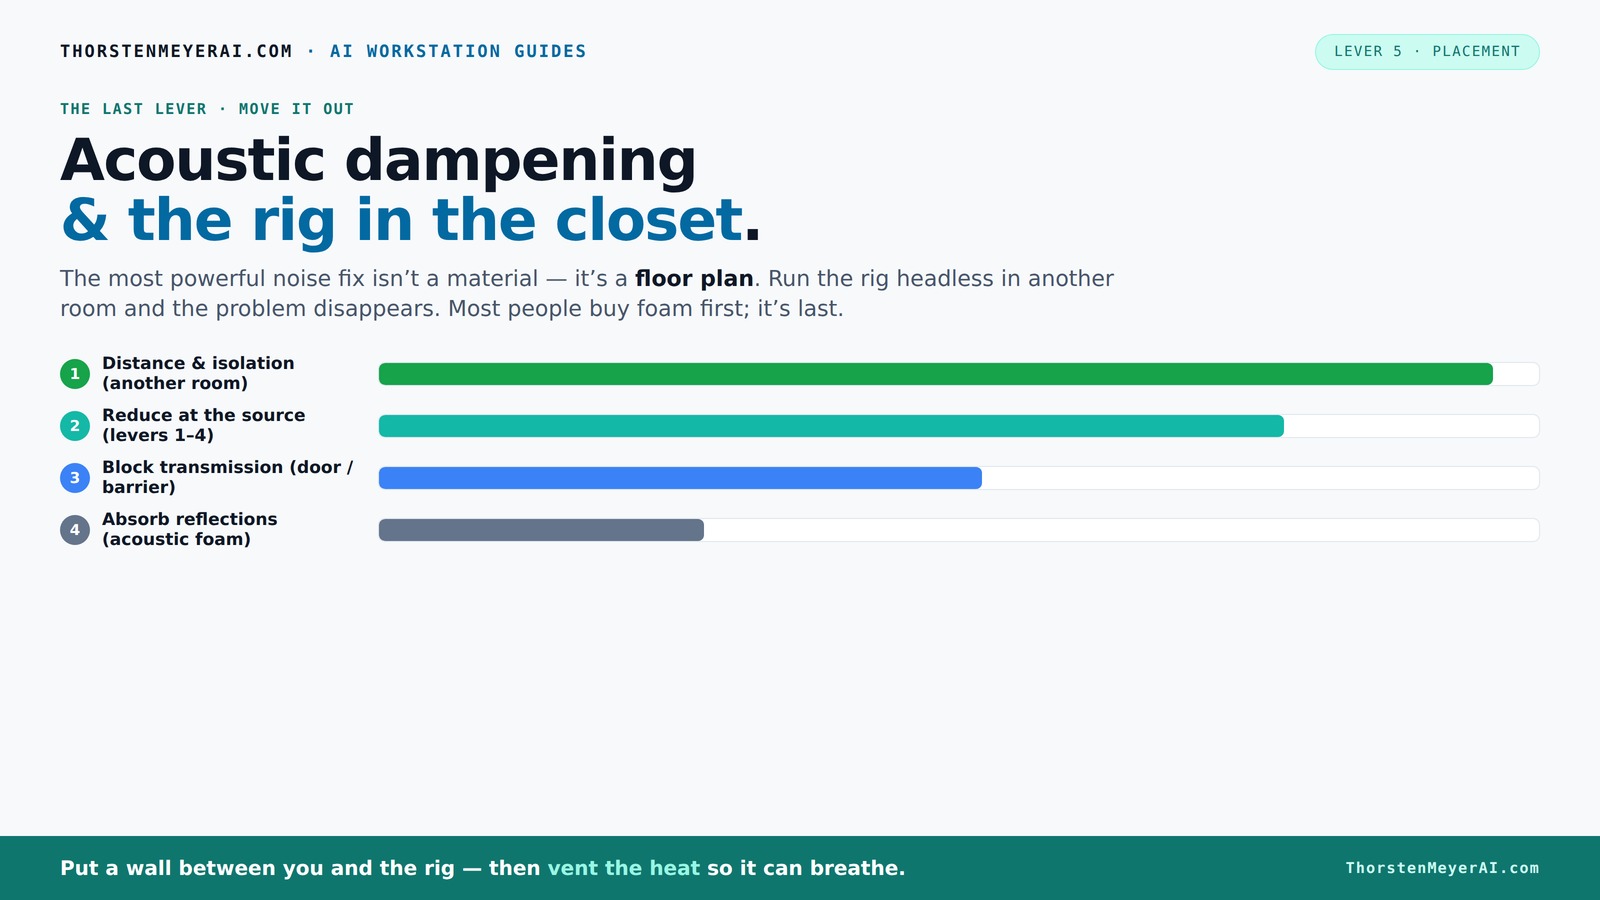
The most powerful noise fix isn’t a material — it’s a floor plan. A rig you can’t hear because it’s in another room beats any amount of foam. Tap the approaches in Part 1 to see what actually works.
(another room)
(levers 1–4)
(door / barrier)
(acoustic foam)
Contain the noise, not the heat
Key Takeaways
- Moving your rig into a separate room or closet is the most effective way to reduce noise, especially for AI workstations.
- Proper ventilation is essential when placing a hot rig in a closet; passive vents or quiet exhaust fans prevent heat buildup and noise escalation.
- Start acoustic treatment at reflection points — ceiling, behind the mic, and the desk surface — for maximum clarity.
- Sealing gaps around doors and cracks vastly improves sound isolation, often more than adding foam alone.
- Use a mix of absorption (foam, blankets) and blocking (seals, barriers) to tame both airborne and structure-borne noise.

Focusound 52 Pack Acoustic Foam Panels 1" x 12" x 12" Sound Proof Foam Panles Soundproofing Noise Cancelling Wedge Panels for Home Office Recoding Studio with 300PCS Double-Side Adhesive
- Soundproofing Design: Triangular grooves for noise absorption
- Includes Adhesive Tape: 300pcs double-sided adhesive for easy installation
- Easy Shape Recovery: Reverts to shape after soaking in water
As an affiliate, we earn on qualifying purchases.
As an affiliate, we earn on qualifying purchases.
Why Moving Your Rig Is the First Step to Better Sound
The best way to cut noise and reflections in a tiny space? Put distance between yourself and the source. When your rig is in another room or a closet, its noise simply doesn’t bother you anymore. This simple move can cut sound transmission by over 80%, according to real-world tests.
Imagine working on a voice-over at your desk while your powerful GPU rig roars in the closet. You don’t hear a thing. All the noise stays trapped, and your workspace remains peaceful. Plus, it reduces heat buildup and noise in your main room, making your environment calmer.
To do this effectively, ensure you have a wired network connection to control the rig remotely. Ventilation becomes critical — more on that next. reducing heat and noise in AI workstations.
The 'Rig in the Closet' Setup — How to Ventilate and Keep Cool
Placing a heat-generating machine in a closet sounds perfect for noise reduction — but heat buildup is the enemy. Without proper airflow, your rig will throttle, fans will scream, and all your efforts go to waste.
To prevent this, install passive vents or, better yet, a quiet exhaust fan that pulls hot air out. Think of it like a chimney for your closet: hot air rises and escapes, pulling in cooler air from outside. This keeps your rig cool and noise levels manageable.
For serious setups, consider a purpose-built soundproof cabinet with ducted airflow and temperature sensors. These systems can keep noise down to around 36 dB while dissipating hundreds of watts of heat. Acoustic dampening tips.
Need more detailed advice? Check out this guide on [reducing heat and noise in AI workstations](https://thorstenmeyerai.com/reduce-heat-noise-ai-workstation/).
Acoustic Treatment 101: Absorption vs. Blocking — What Really Works
Acoustic dampening isn’t just about foam panels. It’s a balance of absorbing sound reflections inside the space and blocking sound transmission outside. Understanding this difference is key to building a quiet closet studio.
Airborne noise like fan hum or GPU whine can be softened with foam or blankets, but only a solid barrier — a door seal or dense panels — blocks sound from escaping. Meanwhile, structure-borne noise, like vibrations traveling through the floor or desk, needs decoupling with rubber grommets or anti-vibration pads.
For example, placing a thick blanket over the door reduces leakage, but sealing cracks with acoustic sealant prevents sound leaks through gaps. Combining both approaches yields the best results.
It’s important to understand why these distinctions matter. Absorption inside the space reduces the echo and "boxiness" that can muddy recordings, especially in small rooms where sound waves bounce around rapidly. Blocking sound transmission, on the other hand, prevents your noise from escaping and disturbing others, which is crucial if you share a space or live close to neighbors. Neglecting either aspect can lead to a room that sounds good for recording but still leaks sound externally, or one that blocks outside noise but sounds echoey and boomy inside. Achieving a balance ensures clarity both in your recordings and in your environment.
Strategic Placement: Where to Focus Your Treatment First
When treating a tiny closet, not all areas are equal. Start with the main reflection points — usually the ceiling, the wall behind the mic, and the desk surface. These are the spots where sound bounces back into your mic, creating echo and boxiness.
For example, in a closet about 3x3 feet, mounting foam panels on the ceiling and the wall behind your mic can dramatically clear up vocals. Add a bass trap in the corner if low-end buildup is an issue. These small tweaks often make the biggest difference.
Many DIYers overlook the ceiling, but in small spaces, it’s a major reflection point. Use acoustic blankets or foam to dampen these surfaces — it’s a quick win.
Understanding where sound reflections originate helps you prioritize treatment. Focusing on these key points ensures your efforts are efficient and effective, preventing unnecessary treatment of less problematic areas. This targeted approach improves your home studio setup.
Corners, Doors, and Gaps: The Weak Links in Your Setup
Sound leaks through cracks and gaps worse than you think — especially around doors. Sealing these is one of the easiest, cheapest ways to cut noise transmission. Learn about acoustic dampening.
Use weatherstripping, acoustic sealant, and door sweeps to close gaps. For a closet door, a heavy, dense curtain or blanket can help block sound if sealing is impractical.
In a real-world example, sealing a closet door with weatherstripping reduced sound leaks by nearly 60%, making recordings clearer and quieter for neighbors.
Why do gaps matter so much? Because sound travels through even tiny openings, especially at higher frequencies. If you leave cracks around doors, vents, or panels, your noise can escape or enter, defeating your efforts at control. Proper sealing creates a more airtight environment, which significantly enhances your sound isolation. Even small improvements here can make your recordings much cleaner and your environment more peaceful, especially when combined with other treatments.
How Thick Should Your Absorption Panels Be? Size Matters
The thickness of your acoustic panels depends on what you want to absorb. For high frequencies, 1-2 inch foam or blankets work well. For low-end buildup, you’ll need 4-inch bass traps or thicker panels. Visit our home improvement tips.
In a small closet, 2-inch panels are usually enough for mid and high frequencies, but adding bass traps in corners will help tame low frequencies. Think of it like adding layers — the thicker, the broader the frequency range you cover.
Choosing the right thickness is about balancing effectiveness with space constraints. Thinner panels are easier to install and less obtrusive but may not absorb lower frequencies effectively. Thicker panels and bass traps, while bulkier, provide better low-frequency control, which is often the weak point in small, enclosed spaces. Proper placement of these panels ensures that you’re targeting the right frequency ranges, resulting in cleaner recordings and a more controlled environment.
The Big Mistakes DIY Closet Studios Make (and How to Avoid Them)
Common pitfalls include over-treating one area and neglecting others, sealing the space too tightly without ventilation, and choosing the wrong mic or placement.
For instance, blocking every crack without ventilation causes heat buildup, which can damage equipment. Similarly, hanging foam on every surface might block reflections but leaves sound leaks open at the door and gaps.
Pro tip: Balance treatment with ventilation, treat the main reflection points first, and seal gaps effectively. It’s a game of layers, not just foam.
Understanding the tradeoffs is key. Over-treating can create a dead-sounding space that sounds unnatural, while under-treating leaves too many reflections and leaks. Sealing without ventilation can cause heat issues, risking hardware damage. Choosing inappropriate mic placement or using the wrong mic can also undermine your efforts. The goal is a balanced approach: treat critical reflection points, seal gaps to prevent leaks, and ensure proper airflow to keep equipment cool. This layered strategy ensures your closet studio is both quiet and acoustically optimized without unnecessary compromises.
Frequently Asked Questions
What’s the difference between soundproofing and acoustic treatment?
Soundproofing stops sound from escaping or entering a space — think sealing gaps and adding mass. Acoustic treatment reduces reflections and echoes inside a room, making recordings clearer. A closet primarily needs treatment to control reflections, while true soundproofing requires more structural work.
Where should I place the microphone in a closet booth?
Position the mic about 6-8 inches from the wall behind it, aiming away from reflective surfaces. Use a shock mount and keep it off the desk if possible. Treat the wall behind and above the mic with absorption to minimize early reflections and boxiness.
Should I treat corners or walls first?
Start with the main reflection points — ceiling, wall behind the mic, and the desk surface — then add bass traps in corners if low-frequency buildup persists. Prioritizing these spots yields the biggest improvements in sound clarity.
How thick should panels or bass traps be for a small closet?
For general treatment, 2-inch panels on walls and 4-inch bass traps in corners work well. Thicker panels are better for capturing low frequencies, which tend to build up in small, enclosed spaces.
Can I rely on foam or blankets alone?
They help reduce echo and reflections but won’t stop sound leaks or low-frequency buildup. Combining absorption with sealing gaps and using barriers is the best approach for a quiet, professional setup.
Conclusion
Transforming a tiny closet into a quiet, effective recording space isn’t magic — it’s about strategic placement, smart treatment, and ventilation. Your rig can roar in the closet, and you won’t hear a thing. The key is thinking layers: treat reflections, block leaks, and keep it cool.
Remember, a well-placed, well-treated closet studio can deliver professional sound without breaking the bank. So, go ahead — set up your quiet corner, and let your voice shine.