Paint samples often look wrong because lighting, surface texture, and application techniques can distort how the color appears. To test them properly, use large enough areas with the same tools you’d apply the full coat, and always evaluate in different lighting conditions. Dry your samples completely before judging, and consider the surface material and finish. Doing this carefully helps you choose the right color; keep going to discover more tips for accurate testing.
Key Takeaways
- Test paint samples on large, representative wall sections using consistent tools and techniques to ensure accurate color reflection.
- Evaluate samples under various lighting conditions, including natural and artificial light, at different times of day.
- Consider surface texture and material, as rough or uneven surfaces can alter perceived color.
- Apply multiple thin coats and allow at least 24 hours for drying before assessing the final color.
- Ensure uniform application and proper drying to avoid misleading color perceptions and achieve true results.
Have you ever struggled to choose the perfect paint color for your space? It’s a common challenge, especially when the paint sample you test doesn’t quite match what you envisioned. One reason this happens is a lack of understanding about color consistency and application techniques. When you test a paint sample, you might notice that the color looks different on your wall than it does in the small swatch. This discrepancy occurs because paint can change appearance based on the surface, lighting, and how you apply it. To get an accurate idea of how the color will look, you need to focus on maintaining color uniformity during testing and understand proper application techniques.
Achieving true paint color requires proper testing, application, and understanding of lighting and surface effects.
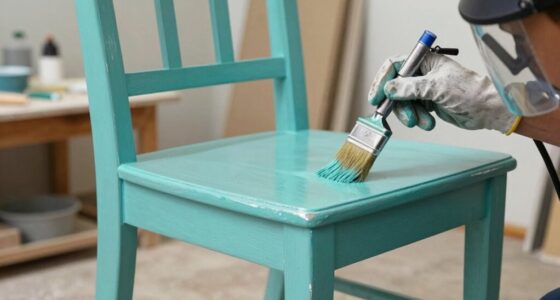
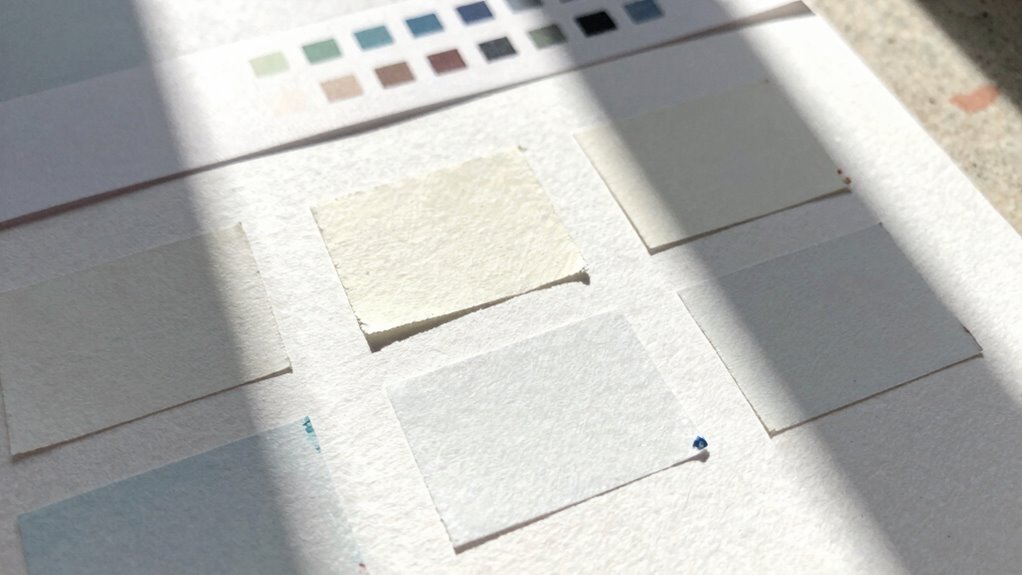
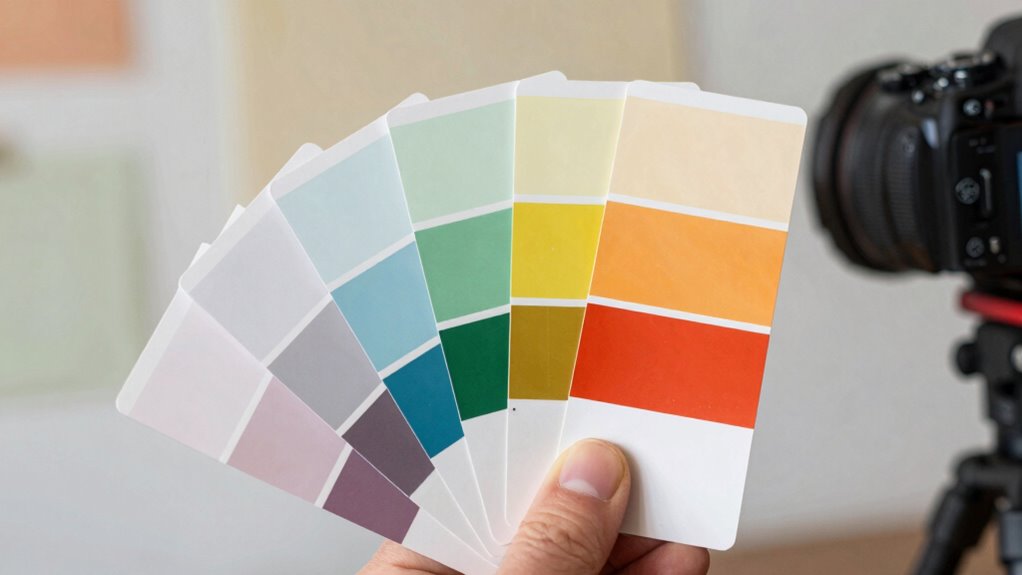
First, make certain that you’re testing your paint samples on a large enough area of your wall. Small patches can be misleading because they don’t reflect how the color will look when applied across a larger surface. When you apply the sample, do it with the same tools and techniques you’ll use for the entire project. This means using a roller or brush with consistent pressure and avoiding overlapping strokes that might cause uneven coverage. Applying multiple thin coats rather than one thick coat helps you see the true color and finish, as thick coats can alter the appearance.
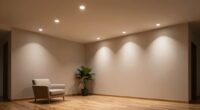
Lighting plays an essential role in how paint looks, so test your samples at different times of the day—morning, afternoon, and evening. Natural light can make a big difference, and your room’s artificial lighting can change the way the color appears. Also, keep in mind that paint can look different on various surfaces, so test on the actual wall material or similar paint samples to see how the texture affects the color. Additionally, understanding color consistency and how it varies across different conditions will help you make better choices. It’s also helpful to recognize that application techniques can significantly influence the final appearance, so practicing proper methods can save you from costly mistakes. Being aware of lighting conditions and how they impact color perception will further ensure your choice is accurate. Moreover, understanding how drying time influences the final look can help you assess the true color more effectively.
Another factor to consider is surface texture, as a rough or uneven surface can distort the perceived color, making it appear different than on a smooth wall. One common mistake is not allowing enough drying time between coats or tests. Paint often looks darker or duller when wet, and it can change as it dries. Wait at least 24 hours before making your final decision, and observe how the color evolves with time. If your test area isn’t uniform in color, check your application techniques. Uneven pressure or inconsistent coverage can lead to color inconsistency, making the sample seem off. To prevent this, use consistent application methods and let each coat dry completely before evaluating.
Ultimately, testing paint samples correctly involves paying attention to application techniques and understanding how color uniformity can vary with surface, lighting, and drying time. By being precise in your testing process, you’ll make better decisions and select a color that looks just right in your space.

Complete Paint Removal Test Kit – Find the Right Paint Remover for Your Project – Kit Includes 8oz Samples of Peel Away 1, Smart Strip Advanced, & Smart Strip PRO, Laminated Paper & Accessories
INCLUDED IN EVERY KIT – 8oz samples of Smart Strip Advanced, Smart Strip Pro, & Peel Away 1,…
As an affiliate, we earn on qualifying purchases.
As an affiliate, we earn on qualifying purchases.
Frequently Asked Questions
How Long Should I Wait Before Evaluating the Paint Sample’s True Color?
You should wait at least 24 hours before evaluating the paint sample’s true color, giving it enough time to dry completely. This guarantees accurate assessment of color consistency, as paint can look different when wet. Keep in mind that some colors may take longer to settle, so observe the sample over a couple of days if needed. Patience with sample drying time helps you choose the perfect shade confidently.
Can Lighting Conditions Affect the Perceived Color of a Paint Sample?
Yes, lighting conditions considerably influence how you perceive a paint sample’s color. Lighting influence can cause color inconsistencies, making the sample look different under various lights. To guarantee accurate color assessment, test your sample in different lighting environments—natural, fluorescent, and incandescent. This helps you see how the color maintains consistency, so you can be confident your chosen hue will look great in your space, regardless of the lighting.
Is It Better to Test Paint Samples on Different Wall Textures?
Yes, testing paint samples on different wall textures helps you see how the color reacts with surface variations. Before testing, guarantee proper wall preparation—clean and smooth the surface for accurate results. Use a sample size large enough to cover a significant area, so you observe the true color in various lighting conditions. This approach helps you make a confident decision, considering how textures can influence the paint’s appearance.
How Do I Choose the Best Location for Testing My Paint Samples?
A picture is worth a thousand words, so choose your test spot wisely. Pick a location with good natural light, avoiding direct sunlight or shadows that can distort color. For the best results, place your sample on a wall with similar color consistency and texture as your entire space. Sample placement matters—test in areas that reflect your main lighting and surroundings to see how the color truly looks.
What Environmental Factors Can Alter the Appearance of Paint Samples?
Environmental factors like lighting, temperature, and humidity can considerably alter your paint samples’ appearance. Poor lighting may affect color consistency, making samples seem different than they truly are. Surface absorption varies with material, impacting how paint looks once dry. To get an accurate idea, check your samples in different settings and on various surfaces, ensuring consistent lighting and conditions to see the true color and finish.

Pro Grade Paint Roller Kit, Brush & Roller,10 Piece Set, Wall Painting Naps for Professionals & Homeowners – All Paints & Stains, Washable, Reusable, Easy to Clean, Superior Absorbency.
WHAT'S IN THIS 10 PIECE PAINT KIT FOR WALLS: includes one plastic paint tray; one 9 inch roller…
As an affiliate, we earn on qualifying purchases.
As an affiliate, we earn on qualifying purchases.
Conclusion
When your paint samples seem to dance with the wrong colors, it’s like trying to read a map in a fog—you need clarity. Test your samples in different lighting and on multiple walls, like shining a flashlight in every corner of a mystery. Only then will your chosen hue reveal its true self, shining like a star in the night. Trust this process, and your walls will tell their perfect story, vibrant and true.
Light Meter Digital Illuminance Meter Handheld Ambient Temperature Measurer, Range up to 200,000 Lux, Luxmeter with 4 Digit Color LCD Screen
Measures luminosity from 0 to 200,000 Lux and ambient temperature
As an affiliate, we earn on qualifying purchases.
As an affiliate, we earn on qualifying purchases.

6.56FT Long Heat Gun, Uptdae Version Homidic Mini Handheld Hot Air Gun, Electric 300W Portable Heat Gun for DIY Craft Embossing, Shrink Wrapping PVC, Drying Paint, Clay, Rubber Stamp
★ Long Cable Enough for Crafting : 6.56FT Long Cable !!!!! Hot air shrink gun was made of…
As an affiliate, we earn on qualifying purchases.
As an affiliate, we earn on qualifying purchases.