
To create vintage charm on furniture, focus on distressed paint finishes that add character and authenticity. Use chalk paint for a matte, aged look, then gently sand edges and corners to mimic natural wear. Layer different shades or apply stains to achieve a weathered, sun-bleached effect. Emphasize imperfections and use tools like sanding blocks and damp cloths for organic distressing. Keep experimenting, and you’ll uncover more tips to perfect your vintage piece.
Key Takeaways
- Use chalk paint and gentle sanding to create authentic, vintage-inspired distressed finishes with character.
- Incorporate layering of paint and stain to mimic aged, sun-bleached wood effects.
- Focus on organic imperfections by distressing edges and corners for a natural, worn look.
- Refine distressed areas with damp cloths to enhance weathered, aged appearance.
- Seal with matte or satin topcoats to protect and maintain the vintage charm.

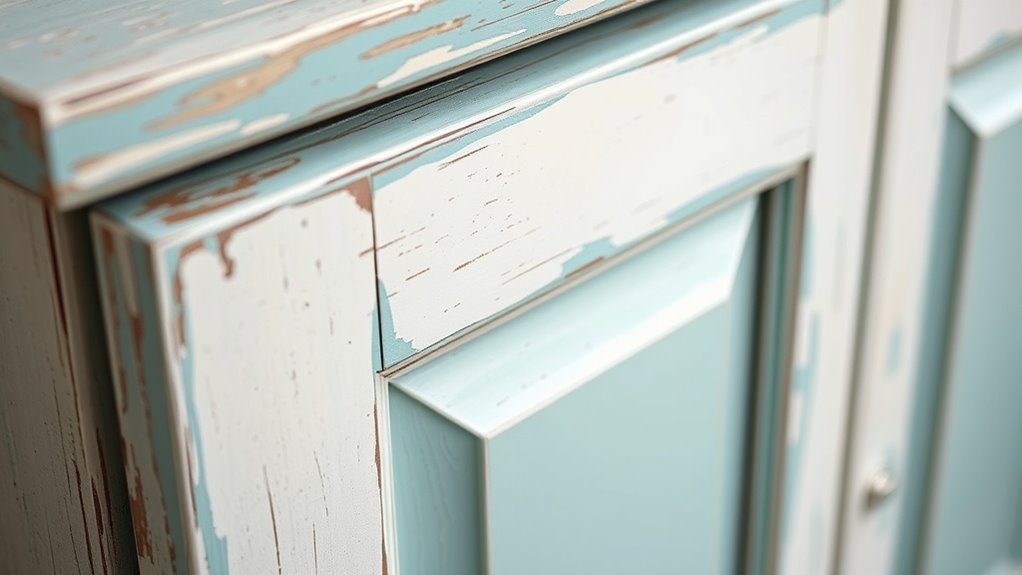
Distressed paint finishes give furniture a charming, vintage look that adds character and personality to any space. If you’re looking to achieve this timeless aesthetic, mastering chalk paint techniques is essential. Chalk paint is favored for its matte finish and ease of application, making it perfect for creating distressed effects. Start by applying a few coats of chalk paint in your desired color, allowing each layer to dry thoroughly. Once dry, you can use sandpaper or a sanding block to gently wear down edges and corners, revealing the underlying layers or original wood beneath. This process mimics natural wear and tear, giving your furniture that authentic aged appearance. Additionally, using a damp cloth to wipe away excess paint or distress specific spots will help you refine the look, ensuring it appears naturally weathered.
Weathered wood finishes are another popular approach to achieving a vintage vibe. To create this effect, you can use a combination of paint and stain to replicate the look of aged, sun-bleached wood. After applying a base coat of light-colored chalk paint, you might add a diluted stain or glaze that’s slightly darker, then wipe it off while it’s still wet. This technique emphasizes the grain and imperfections, giving your furniture a sense of history. For a more textured weathered finish, you can also incorporate layering—applying different shades of paint or stain and then distressing them selectively. Using a dry brush with a contrasting color over a base coat creates a subtle, worn-in look that resembles weathered wood. Modern safety features, such as auto shut-off, ensure that distressed furniture finishes remain safe and reliable during use.
The key to successful distressed finishes lies in your approach to distressing. Whether you’re using chalk paint techniques or weathered wood finishes, always test your methods on scrap pieces first. Start with light distressing—less is often more—then add more as needed to avoid overdoing it. When you’re ready, seal your work with a clear matte or satin topcoat to protect the finish while maintaining the vintage charm. Remember, the beauty of distressed furniture is its imperfections; each scratch or worn spot should look intentional and organic. With patience and practice, you’ll develop a skill for creating furniture that looks like it’s traveled through decades, full of stories and character, right in your own home.

Rust-Oleum Linen White Chalked All-in-One Ultra Matte Paint | One Coat Coverage | No Primer, Sanding, Or Topcoat Needed | Easy Clean Up | Made in USA | 30 OZ
EASY TO USE, EVEN FOR BEGINNERS: Whether you’re new to DIY or a pro, Rust-Oleum Chalked makes painting…
As an affiliate, we earn on qualifying purchases.
As an affiliate, we earn on qualifying purchases.
Frequently Asked Questions
How Long Does Distressed Paint Finish Typically Last?
A distressed paint finish typically lasts several years, depending on your paint durability and how much aging effects you desire. If you use quality paints and sealers, it can stay attractive for 5-10 years. Regular care and avoiding harsh cleaners help preserve the look. Keep in mind, aging effects are part of the charm, so minor chipping or fading over time adds to the vintage appeal without compromising durability.
Can Distressed Finishes Be Applied to Outdoor Furniture?
Yes, you can definitely distress outdoor furniture! To guarantee outdoor durability, choose weatherproof coatings that resist rain, sun, and snow. Applying a suitable sealant over the distressed finish helps protect it from the elements, maintaining its charm and character. With careful coating, your outdoor piece can boast beautiful, battered beauty while enduring the weather’s whims. So, get creative with distressed finishes and enjoy your furniture’s fabulous, fearless outdoor flair!
What Types of Paint Are Best for Distressing?
You should use chalk paint or latex paint for distressing furniture. Chalk paint is ideal because it adheres well without much prep and gives a matte, vintage look perfect for distressing. Latex paint is also a good choice as it’s durable and easy to work with, allowing you to sand and chip it for that authentic distressed finish. Both options help you achieve charming, aged furniture with ease.
Is Special Equipment Needed for Creating Distressed Finishes?
You don’t need special equipment to create distressed finishes, but having the right tools helps. Basic tools like sandpaper, a paint scraper, and a brush are essential. Make sure to follow safety precautions, such as wearing a mask and gloves, especially when sanding or using chemical finishes. These tools allow you to achieve the desired worn look safely and effectively, giving your furniture that charming, vintage appeal.
How Do I Repair or Touch up Distressed Furniture?
To repair or touch up distressed furniture, start by evaluating the area and matching the color carefully. Use a small brush for precise color matching, blending it seamlessly. Lightly sand the spot with gentle sanding techniques to smooth out imperfections and blend the repair into the surrounding finish. Then, apply a matching paint or stain, allowing it to dry completely. Finish with a light sanding if needed for a seamless, vintage look.

Giwiemi 8 Pack Sanding Sponge, Washable & Reusable Sanding Blocks for Drywall, Wood, Metal & Furniture — Premium Sandpaper Block Assortment with 60/80/120/220 Grit
【ASSORTED GRIT FOR FLEXIBLE USE】 8PCS set with 4 grits (60/80/120/220), 2 per grit. Easily trimmed for various…
As an affiliate, we earn on qualifying purchases.
As an affiliate, we earn on qualifying purchases.
Conclusion
Embrace the timeless allure of distressed paint finishes, letting each chipped and faded detail tell a story of history and character. Like a well-worn manuscript, your furniture gains depth and charm with every imperfect touch. Remember, beauty often lies in the flaws, echoing the wisdom of age and experience. So, go ahead—breathe new life into your pieces, and watch as they become treasured heirlooms, whispering tales of vintage grace with every glance.
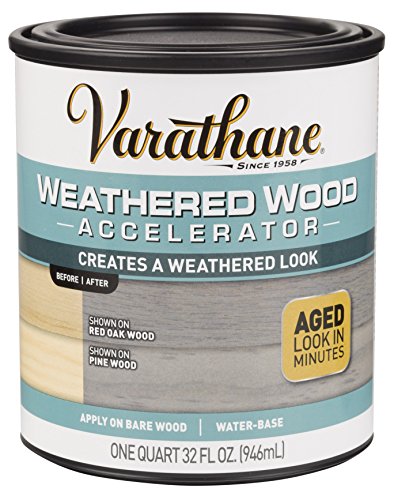
Varathane 313835 Weathered Wood Accelerator, Quart, Gray
For interior use on bare or untreated wood to create a weathered look
As an affiliate, we earn on qualifying purchases.
As an affiliate, we earn on qualifying purchases.
Jolie Finishing Wax – Protective topcoat Paint – Use on interior furniture, cabinets, walls, home decor and accessories – Odor-Free, Non-Hazardous – Clear – 120 ml
Durable Protection: Seals and protects interior furniture, cabinetry, and home decor. Suitable for painted, stained, or raw wood…
As an affiliate, we earn on qualifying purchases.
As an affiliate, we earn on qualifying purchases.