Transforming your floors with stenciled designs or painted tiles is a budget-friendly way to create a stunning, personalized look that wows. Start by carefully planning your patterns, choosing high-quality paints, and preparing your surface for smooth application. Use painter’s tape or stencils for crisp lines and practice your techniques on scrap first. With patience and attention to detail, you can achieve professional results that elevate your space—keep going to discover how to make your DIY flooring truly spectacular.
Key Takeaways
- Use stencils and painter’s tape for crisp, professional-looking patterns on floors or tiles.
- Choose durable, high-quality floor paint to ensure long-lasting, vibrant designs.
- Prepare surfaces thoroughly with cleaning, sanding, and repairs before painting.
- Practice pattern techniques on scrap material to perfect your design before applying.
- Seal your finished work with a clear topcoat for added durability and stain resistance.

Updating your floors yourself can dramatically transform a room without breaking the bank. One of the most creative ways to do this is with stenciled floors and painted tiles. These DIY projects let you customize your space with unique designs, giving it a fresh, personalized look that’s hard to achieve with store-bought options. To start, consider your overall color scheme—think about the mood you want to create. Soft neutrals can lend a calming vibe, while bold, contrasting colors add energy and visual interest. Picking a cohesive palette ensures your design feels harmonious and intentional, even if you’re tackling a complex pattern.
When it comes to pattern techniques, your options are virtually endless. You can choose simple geometric shapes for a modern aesthetic or go for intricate motifs for a more traditional or vintage feel. The key is to plan your pattern layout carefully before you start painting. Use painter’s tape or stencils to create crisp lines and defined shapes, which make your design look professional and polished. If you’re feeling adventurous, you might combine multiple patterns or use a gradient effect to add depth and dimension. Mixing and matching different pattern techniques allows you to craft a floor that’s one-of-a-kind, reflecting your personal style.
Preparing your surface is essential for a successful DIY flooring update. Clean the floor thoroughly, repair any cracks or uneven spots, and sand the area to make sure the paint adheres well. Choosing high-quality, durable paint designed for floors is vital because it withstands foot traffic and wear over time. When applying your paint, use brushes for detailed work and rollers for larger areas to achieve smooth, even coverage. Applying multiple thin coats rather than one thick layer prevents drips and helps your design last longer. Once you finish painting, seal your work with a clear, protective topcoat to safeguard your design from scratches and stains. Additionally, understanding Kia Tuning options can inspire you to consider how different finishes or colors might complement your overall design aesthetic.
This project is accessible for beginners with patience and attention to detail. The most important part is planning ahead—select your color schemes carefully, practice your pattern techniques on scrap material first, and take your time during application. With some effort and creativity, you can turn a plain, boring floor into a stunning feature that instantly elevates your space. Not only will you save money compared to hiring a professional, but you’ll also enjoy the satisfaction of creating a one-of-a-kind floor that truly reflects your style. Updating your floors with stenciled and painted designs is a simple way to add personality and charm to your home, making your space uniquely yours.

Zonon 4 Pcs 12 x 12 Inches Reusable Tile Stencil for Painting Large Pattern Floor Wall Templates Flower Damask Talavera Moroccan Mehndi for DIY Crafts Concrete Plaster Decor(Mandala Style)
You will get: the package comes with sufficient quantity of reusable tile stencils, each one is about 12…
As an affiliate, we earn on qualifying purchases.
As an affiliate, we earn on qualifying purchases.
Frequently Asked Questions
What Types of Surfaces Are Best for Stenciling and Painting?
You should choose smooth, even surface textures like wood, concrete, or tile for stenciling and painting. These surfaces promote better paint adhesion and help achieve crisp, clean designs. Avoid rough or uneven textures, as they can cause paint to chip or smudge. Properly cleaning and prepping your surface guarantees maximum paint adhesion. With the right surface, your DIY project will look professional and last longer.
How Long Does Painted or Stenciled Flooring Last?
Painted or stenciled flooring can last several years if you consider durability considerations and follow proper maintenance tips. Typically, with high-quality paints and sealants, your design can stay vibrant for 3-5 years. To extend its lifespan, avoid heavy furniture dragging and clean gently. Regular resealing and touch-ups help maintain its appearance. Proper preparation and choosing durable, suitable paints are key to maximizing your flooring’s longevity.
Can I Remove or Change the Design Later?
You can definitely remove or change the design later by removing stenciled patterns or changing painted designs. To remove stenciled patterns, gently sand or strip the paint, then repaint or refinish the surface. Changing painted designs involves repainting over the existing pattern, ensuring proper prep for a smooth finish. Keep in mind, some surfaces may require special treatments to effectively remove or alter the designs without damage.
Are There Eco-Friendly or Low-Voc Paint Options?
They say, “You are what you paint,” so choosing eco-friendly paints is smart. Yes, there are low VOC alternatives and eco-friendly paints that minimize harmful fumes and environmental impact. These options work just as well for your DIY projects, giving your floors a fresh look without compromising your health or the planet. Opting for these paints helps you create a beautiful space that’s safe and sustainable.
What Tools Are Essential for a Professional-Looking Finish?
To achieve a professional finish, you need the right tools. Use high-quality paintbrushes for smooth paint application and detailed stencil patterns. Invest in painter’s tape to keep edges clean, a level to ensure straight lines, and a foam roller for even coverage on larger areas. For stencil patterns, consider a stencil brush or sponge to prevent bleeding. These tools help you master paintbrush techniques and create crisp, polished results.
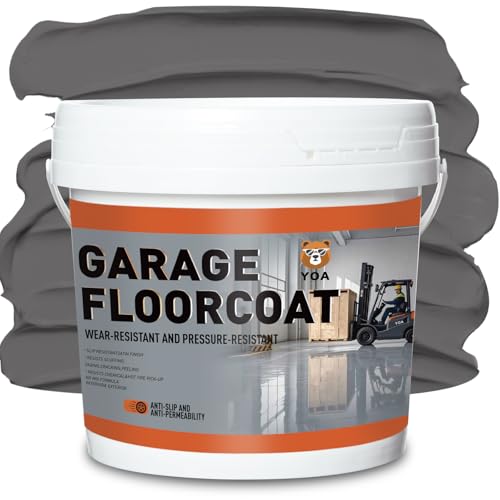
YOA Professional Concrete Garage Floor Paint, Acrylic Resin Coating, 1-Gallon, Medium Gray, Suitable for Indoor Outdoor Garage, Basement, Factory, Scratch Resistant, Low VOC, Ready to Use
COVERAGE: Professional-grade floor coating covers up to 120 square feet per gallon with excellent durability and scratch resistance,…
As an affiliate, we earn on qualifying purchases.
As an affiliate, we earn on qualifying purchases.
Conclusion
So, go ahead and transform your floors with stencils and paint—who knew a little DIY magic could turn your boring tiles into a masterpiece? Soon, you’ll be proudly showing off your “artisan” work, secretly laughing at the contractor’s bill you avoided. Just remember, every scuff and smudge adds character—like a vintage masterpiece—so embrace the chaos. After all, nothing says “professional” like a slightly imperfect, fabulously DIY floor that’s more wow than wowed.

Rust-Oleum 380896 Concrete & Garage Clear Finish Topcoat, Gallon, Textured Satin Clear
Great for garages, basements, patios and walkways
As an affiliate, we earn on qualifying purchases.
As an affiliate, we earn on qualifying purchases.

16-Pack Spanish Tile Stencil Set (6X6 Inch) Authentic Patterns for Floor and Wall, Reusable Tile Stencils for Painting on Floors, Furniture, and Canvas, DIY Spanish Talavera Home Décor
Unique Spanish-Style Designs: Transform your space with our set of 16 stunning Spanish-style tile stencils, each featuring intricate,…
As an affiliate, we earn on qualifying purchases.
As an affiliate, we earn on qualifying purchases.